Wednesday, October 30, 2013

Stashbuster Sampler Sew-a-Long Block #4

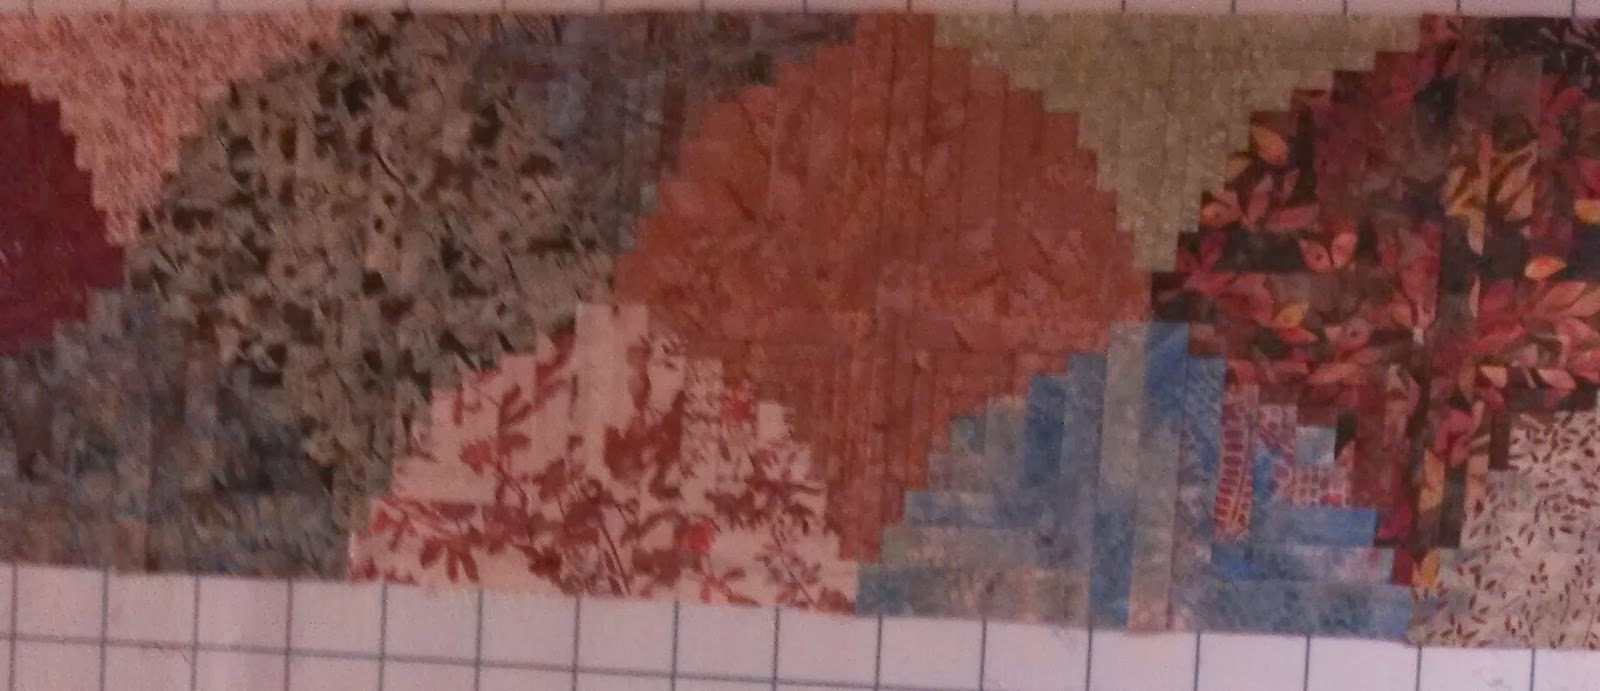
This block is called Rolling Star.  Basically it is a variation on the Ohio Star.
Fabric Requirements:
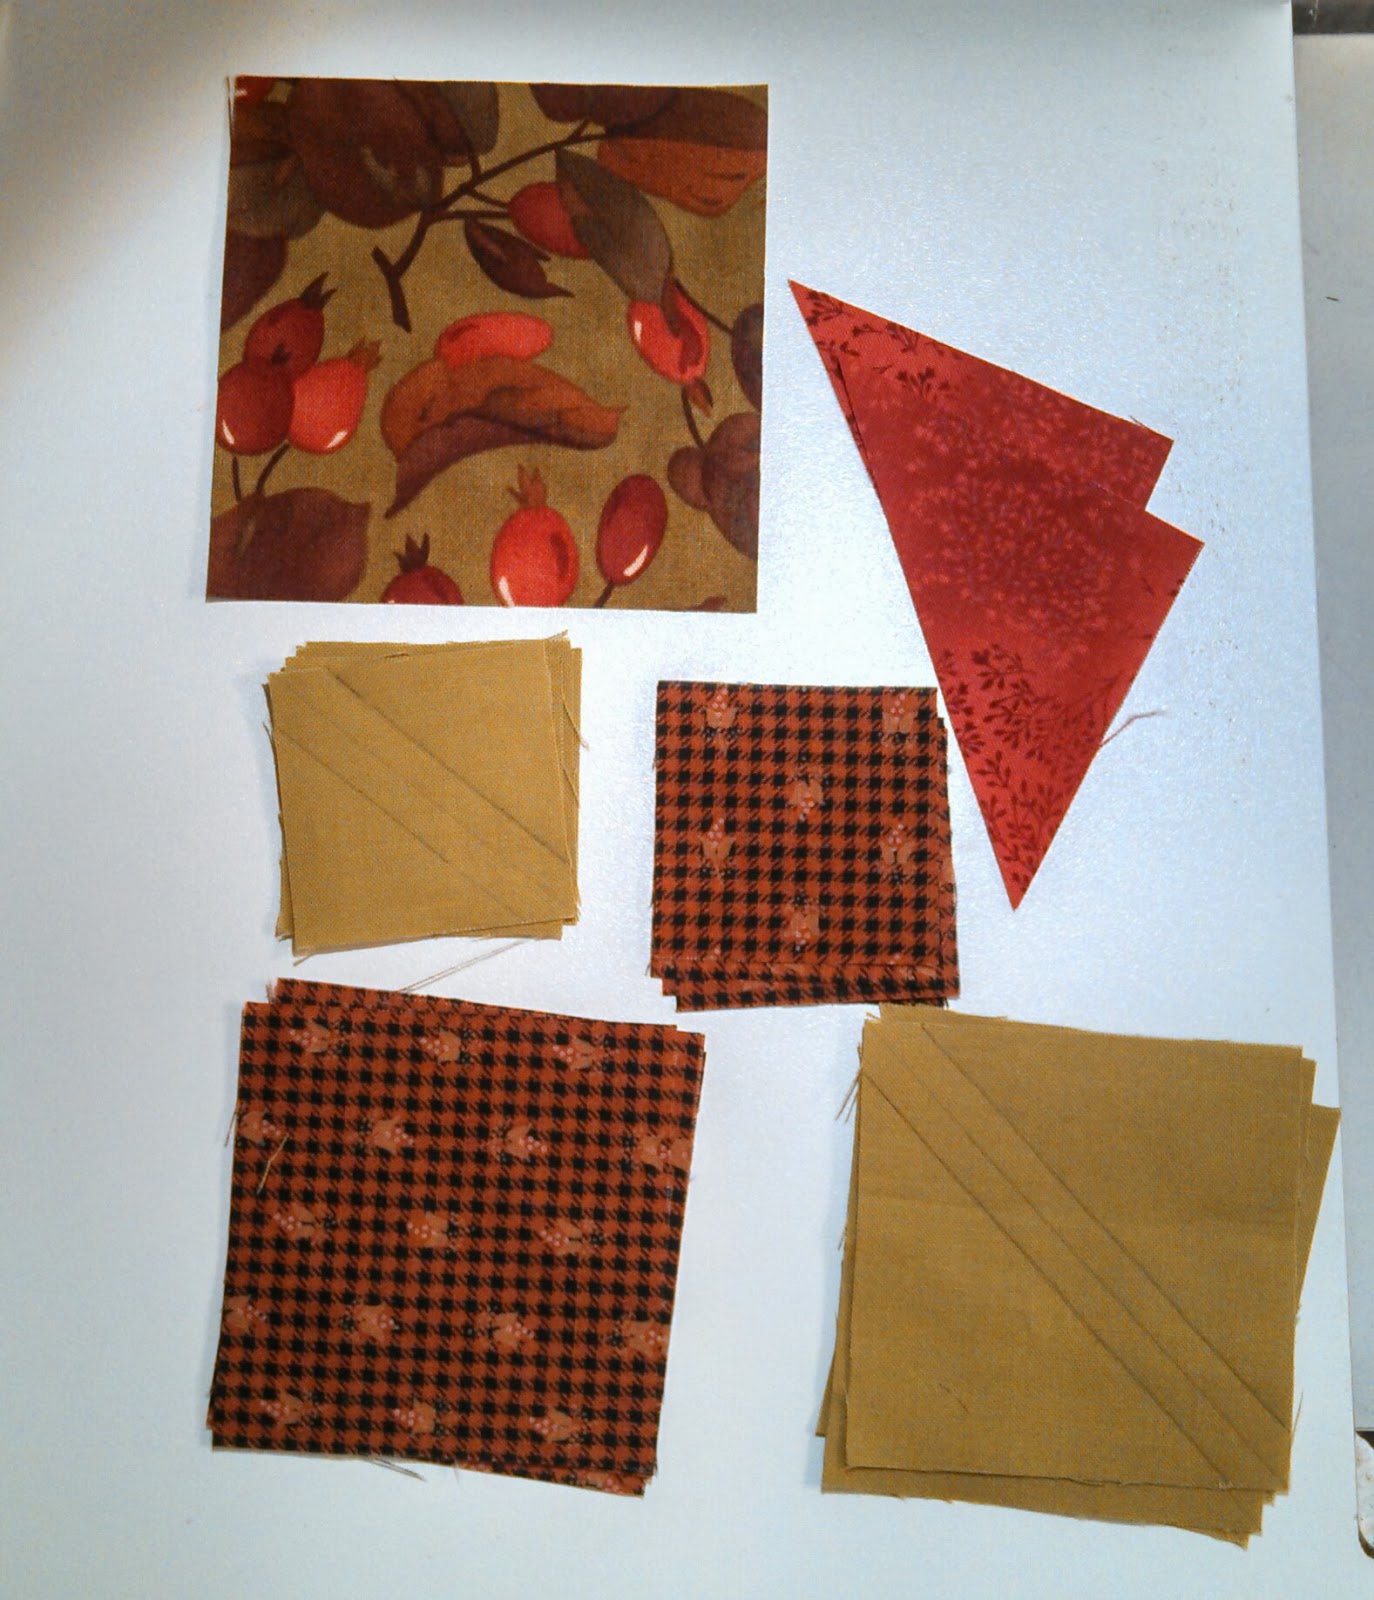
Gold Fabric:  1 scant 3 3/8" square for center, 8 - 2 1/2" squares for star points
Red Fabric:  2 - 2 7/8" squares cut in half diagonally once
Tan Fabric:  2 - 2 7/8" squares, 4 - 4 1/2" x 2 1/2" rectangles
Green Fabric:  2 - 2 7/8" squares.
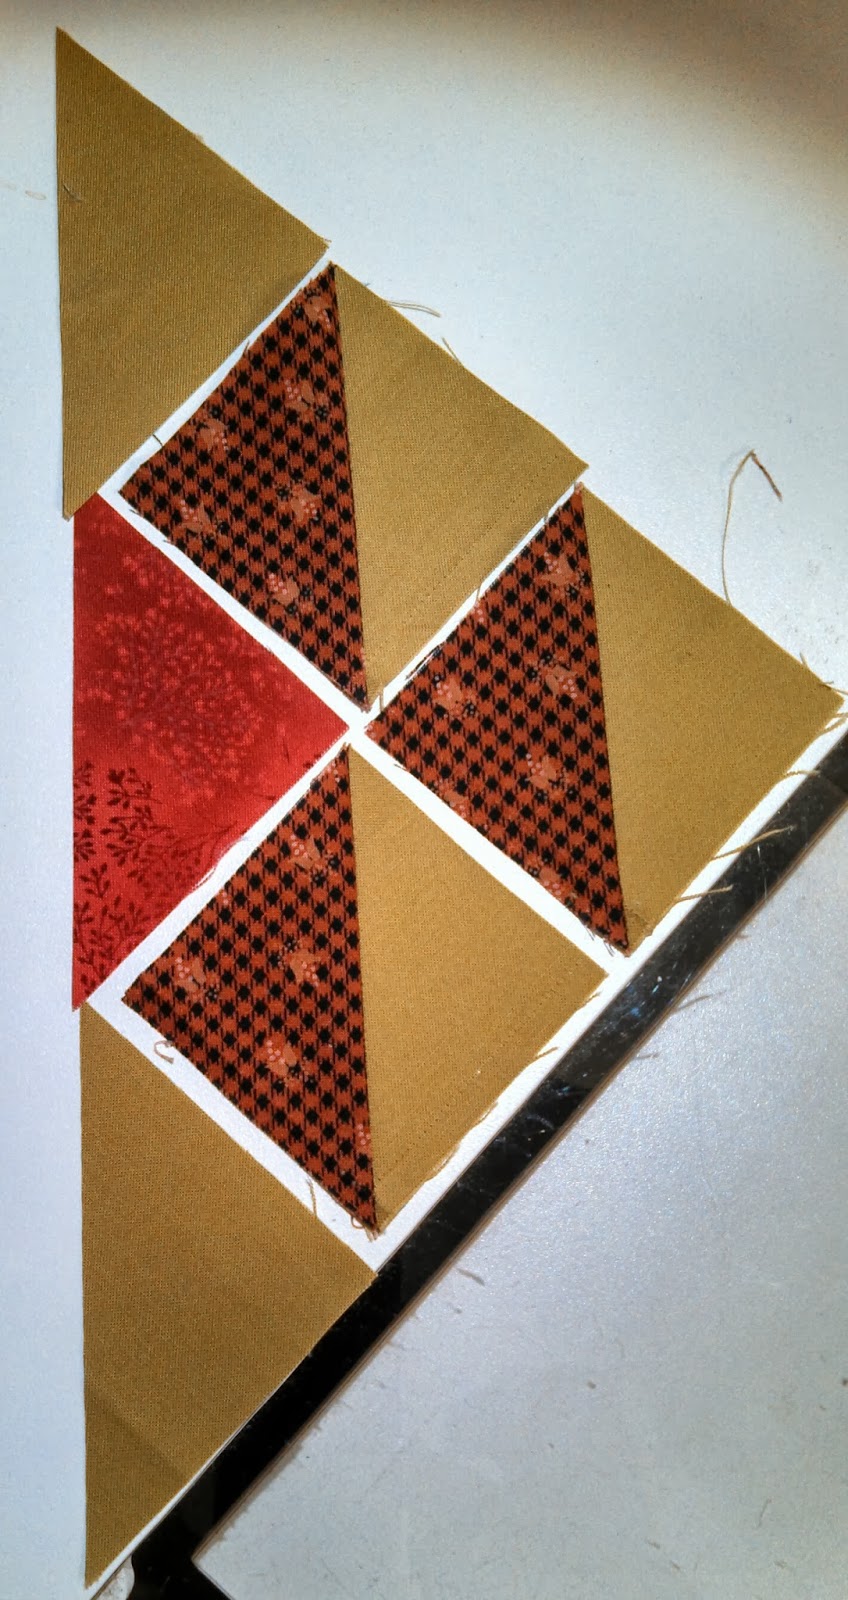
Step 1:  Mark the back of your green and tan 2 7/8" squares to make half square triangles and mark the back of the 8- 2 1/2" squares with a diagonal line which will be your sewing line for the flying geese 
units.  See markings in the picture.

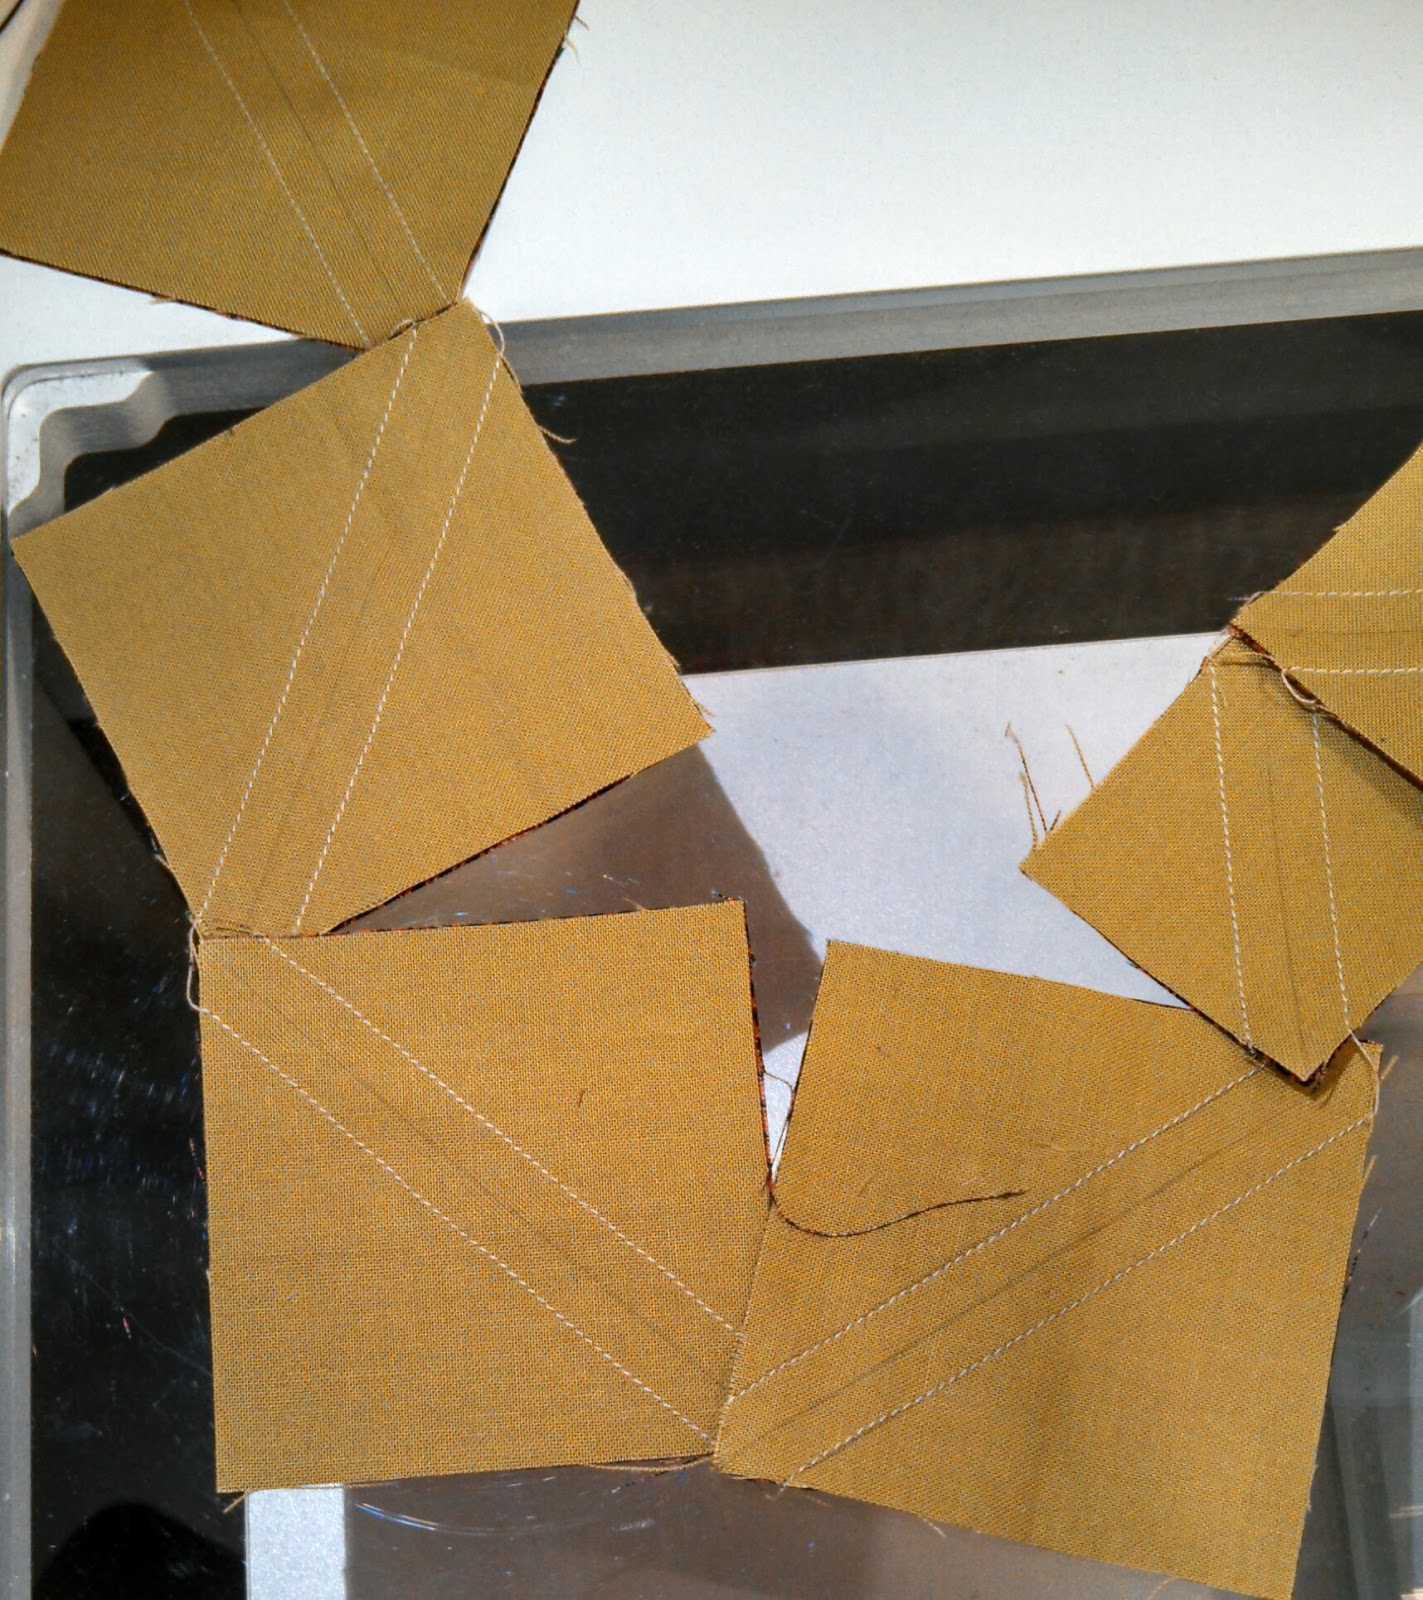
Step 2:  Sew the half square triangles together and cut apart on center line and sew the flying geese units.  Be sure to save time and thread by chain stitching.


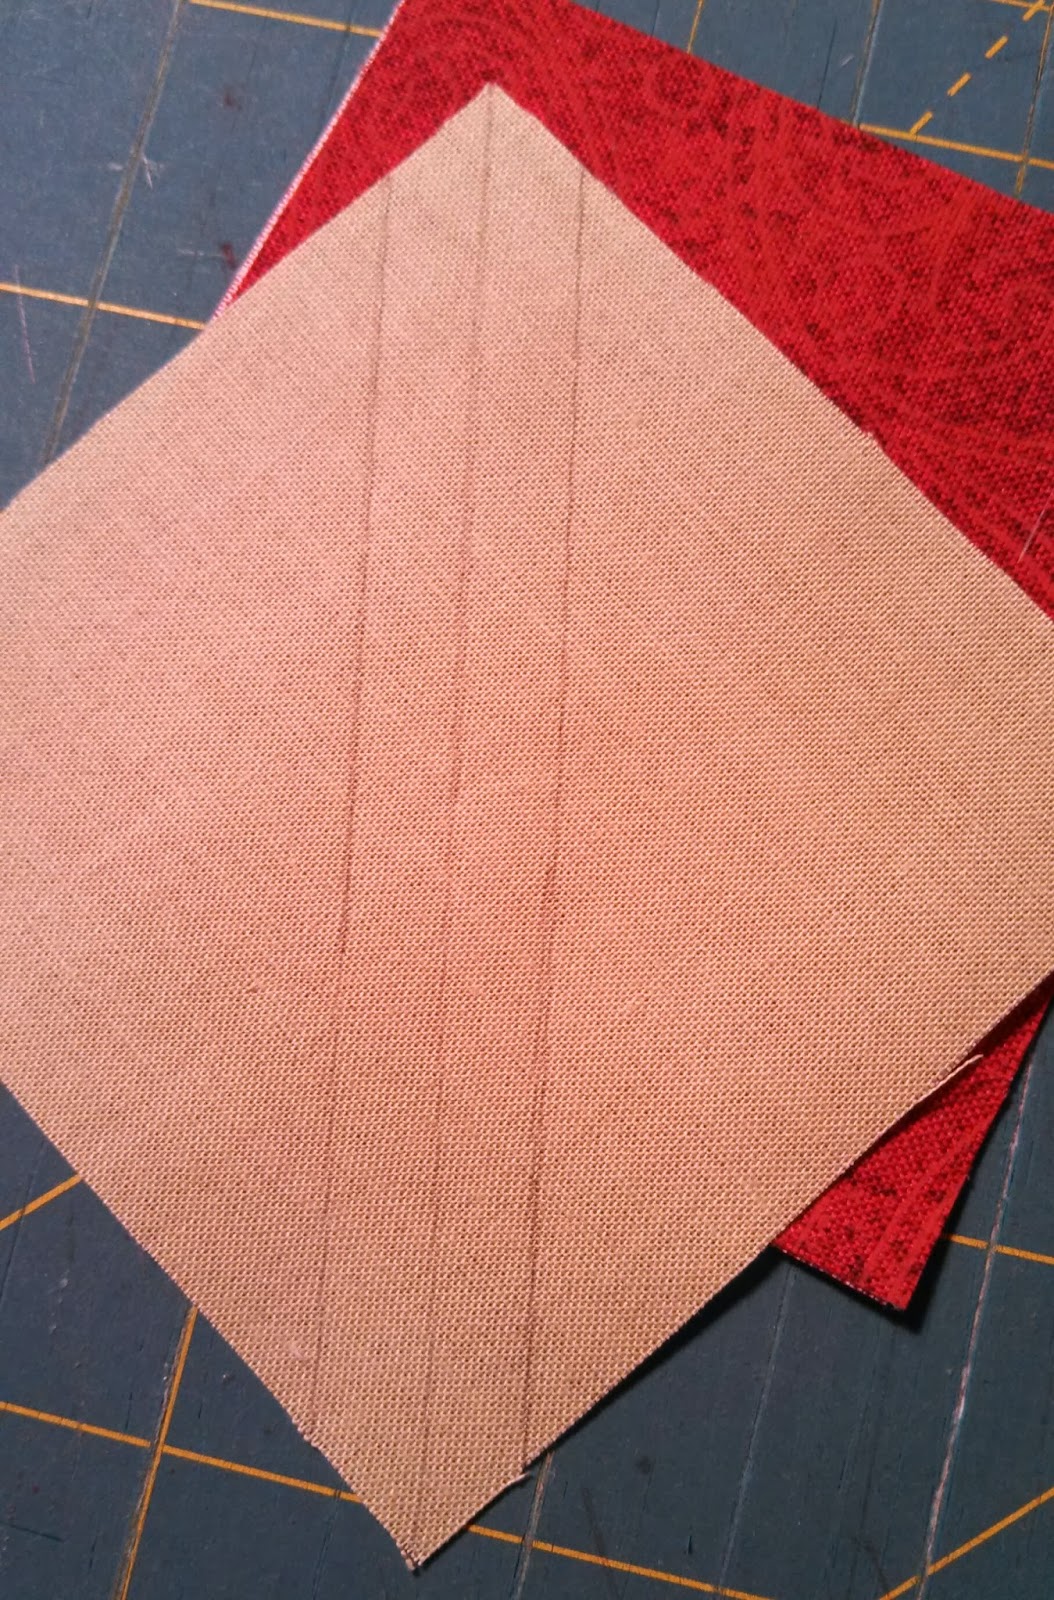
Step 3:  Sew the center square-in-a-square together, sewing first on opposite sides, pressing and then sewing on the other two sides.  Be sure to clip your bunny ears.


Step 4:  All of your block units should be ready to sew together at this point.  Sew half square triangles to either side of two of the flying geese units.  Sew the remaining two flying geese units to either side of the square in a square unit.  Press seams open to reduce bulk.

Step 5:  Sew the 3 units together as shown in the picture at the top of the page.  Again, press the seams open to eliminate bulk in the seams.


Monday, October 28, 2013

Here It Comes!


Thought I should share my morning walk with you.  It was beautiful today and the air had a bit of cold bite to it.  The rain is suppose to be coming by nightfall or tomorrow and turning colder.  Yup, that white stuff is on its way.  Not sure if I am mentally ready for it or not but I know it will come whether or not I'm ready.  I appreciate so many of the people here who absolutely love the snow and are waiting impatiently for it to come.  I wonder if any of them would come and shovel our driveway every morning around 6 a.m.?

There are way too many irons in my fire and several projects I'd like to get going on.  I'm going to restrain until I have at least one of the five done.  I have a full week of teaching ahead and will be working on the next block for the sew a long.  It should be up in the next day or so.

RETREAT TIME is approaching.  There are a few spots left in the February retreat in Sonora/Tuolomne.  Let me know if you are interested and I will get the forms out to you.  For information check the retreat button at the top of the page.  Deposit is due Nov. 15.

Rejoice in each and every day!

Dee

Wednesday, October 23, 2013

Dancing Fairies!!!


Don't know if you ever read the book "Where the Red Fern Grows" in school but there is a scene in the book about fairy rings.  Legend has it that when you find mushrooms growing in a circle in your lawn that the fairies were bringing good luck and happiness to you as they dance away the night.  Here is a partial shot of the fairy ring I found this morning.  I didn't even get it all in the picture because it was fairly large.


After that happy childhood memory I cleaned house for awhile and then headed to the quilt studio to work on my log cabin clam shell.  Here is what I was able to accomplish today.  Hopefully you can see the log cabin blocks.  I love log cabins because there are so many things you can do with them.


The temperature is dropping and the leaves are starting to fall in abundance.  The sweaters and long sleeves have come out of the closet.  I wasn't really done with the warm weather and beautiful days quite yet but here we go late fall and the start of winter.

May your days be filled with warmth and love,
Dee


Saturday, October 19, 2013

Sew-a-Long Block #3


This block is called Road to Home:  The materials you will need are 2 strips - one dark and one med. light that are 2 1/2" by approximately15", Four 2 1/2" squares that are med. dark, Two squares 2 7/8" that are med. and Two squares 2 7/8" that are light.

Draw sewing and cutting lines on the back of the Two light 2 7/8" squares.  Sew right sides together and cut apart to get 4 half square triangles.  Be sure to snip the bunny ears.


Next, you will sew the two strips together and subcut them into 2 1/2" units.  You will need four of them.  Sew together to make four patches.

Next, you will sew the half-square triangles and the squares together to form four patches as well.  Be sure to press seams in opposite directions so that your seams will butt up against one another.  Sew the blocks together according to the picture below.
Enjoy!  Remember to send pictures of your finished blocks.  Would love to see and share them.

Dee

Wednesday, October 16, 2013

Prep Work

When it is time to quilt I want to sit down and get right to work.  The cutting, the reading, the measuring, the ironing, etc. is not generally my favorite parts of the process, the sewing is.  Are you a bit like that too?  Time and again I have regretted jumping in without doing all of my "prepping".  Therefore, reluctantly I am encouraging you to take the time to do some prep work of your own before jumping in.  Here are some of the things that I find helpful when considering a new project:

1.  After deciding on what it is you want to make and for whom or what, read the entire pattern instructions or sketch out your own pattern.

2.  Look carefully at the blocks in your pattern to see what you want to emphasize and that will help you determine your lights and darks and how many of each you will need.

3.  Choose a color scheme.  Once you have determined that, head to your stash to see if there is a theme fabric you want to use for your palette.  If it is there, do the happy dance, and then see what coordinating fabrics you already have.  Now it is time to go shopping for the rest.

4.  Figure out what amounts you still need and the values you need before heading to the quilt shop.  Buy what you need and of course do a little stash adding if you must.  There is always a fabric that calls out to me from the shelves.

5.  Once home, wash and iron your fabrics if that is what you do.  Check over all the cutting instructions a second time and then go to work on the cutting part.  I always cut for only one block first and give the block a test run by sewing it to make sure the pattern is correct and I like what I have chosen.  If all that is good I get down to business and do some chain stitching and what I like to do best- sew and watch the quilt appear under my hands.


Here is the start of my prep work for a log cabin variation quilt.  It looks like I could use a few more darks to make it really pop.  I'm ready to cut and get this quilt underway.  I get so excited over new projects.

May your days be glorious and filled with joy!

Dee

Saturday, October 12, 2013

Enjoying the Bounty

The last of the tomatoes and cantaloupe have been picked.  We have sure enjoyed both recently.  I still say there isn't much better than picking a warm tomato right off the vine and eating it.  The cantaloup weren't very big (I did plant them in a kiddy pool) but they sure were tasty.

Quilting the last week continues to be mostly prep work for classes which is a good thing but I'm ready for a little break to get busy on some projects that have been patiently waiting.  A new pattern is taking form in my head, and as one of my daughter's kindergarten students said, it needs to come out.
It will be hard to work inside tomorrow I'm sure.  The weather has been glorious and the fall colors are really coming into their own.  A neighbor has a pair of sugar maples that are breathtaking as they change from eye popping yellow to orange.

What have you been busy with lately?  Whatever it is I wish you joy in the process and satisfaction in the completion.

Blessings,
Dee

Tuesday, October 8, 2013

Sew Along-Block #2

Whew!  There have been some crazy busy days since returning from CA.  I am happy to have block #2 ready to go.

Pinwheel Dance
You need 4 different fabrics

Fabric 1- the background (green) cut 4 squares at 2 3/8", cut 6 squares 2 7/8"

Fabric 2- (plaid) cut 4 squares at 2 3/8,  cut 3 squares at 2 7/8"

Fabric 3 - (coral) cut 1 square at 2 7/8" and cut in half diagonally

Fabric 4 - (center print) cut 1 square at 3 1/2"

Step 1:  Cut all of your individual pieces.  Draw your sewing lines on the back of the 4 small green squares for the half square triangles in the pinwheels and draw them on the back of 3 of the larger squares for your half square triangles.


Step 2:  I recommend chain stitching all of your half square triangles, cutting apart and pressing.  Clip the bunny ears.

Step 3:  Assemble your pinwheels as shown and sew together.  You will have two when completed.

Step 4:  Press your pinwheels by opening up the center and laying it flat as seen in the picture.  This eliminates the bulk and will make it easier to quilt over as well.

Step 5:   Cut the remaining 3, 2 7/8" squares in half diagonally.  Assemble the half square triangles and the triangles as shown.  Sew together in rows.

Step 6:  Sew the pinwheels to the opposite sides of the 3 1/2" square.  Sew the half square units to each side of the center unit.  Complete the block by sewing the remaining triangles to the two corners of your block as per the picture of the block above.

I hope you are enjoying the sew along so far.  Please let me know how it is going for you and if I need to be more explicit with instructions.

Hopefully you are enjoying these beautiful fall days and crisp nights as much as I am.  Autumn is truly putting on a show here in MI.

Blessings and love,
Dee


Tuesday, October 1, 2013

Quilting in the Garden

I have returned from my CA trip and teaching at Quilting in the Garden.  The class was a lot of fun and met some very lovely ladies and reunited with dear friends.  How wonderful to have seen so many beautiful quilts and even lovelier friends in the garden on Saturday.  My daughter LeAnna and I were amazed at the detail and beauty of the quilts this year.  We also enjoyed our time and conversation with John and Alex Anderson.  It was especially cute that LeAnna was able to sign one of Alex's kids books that she was privileged to be in a few years back.

Meeting with my son, his fiance and her mother and grandmother to see their wedding venue and help them with wedding planning was one of those once in a lifetime moments to cherish.  So honored to be included in that.

Today's special treat is beauty tips from my amazing, beautiful and talented niece Melody.  May you enjoy them as much as I do.


If people don't like foundation or concealer - .you should try "beauty balm" or BB cream for short. It has a moisturizer and a tint of color and it covers up great.
 
You can use coco powder as a bronzer on your cheeks and it is totally inexpensive!
 
If you paint your nails and want a matte finish instead of shiny - just put your nails over the steam from boiling water and hold for about a minute or until the "glossiness" is gone...

May each of your days be blessed with beauty and solace.

Blessings,
Dee