Wednesday, December 11, 2013

Saying Yes

It is hard for me to say no when asked to do something for someone and those rare times I do say no I feel so guilty for awhile.  I was asked some time ago to finish a quilt top for a guy whose mother started it but did not get the chance to finish it.  She passed away before completing it.

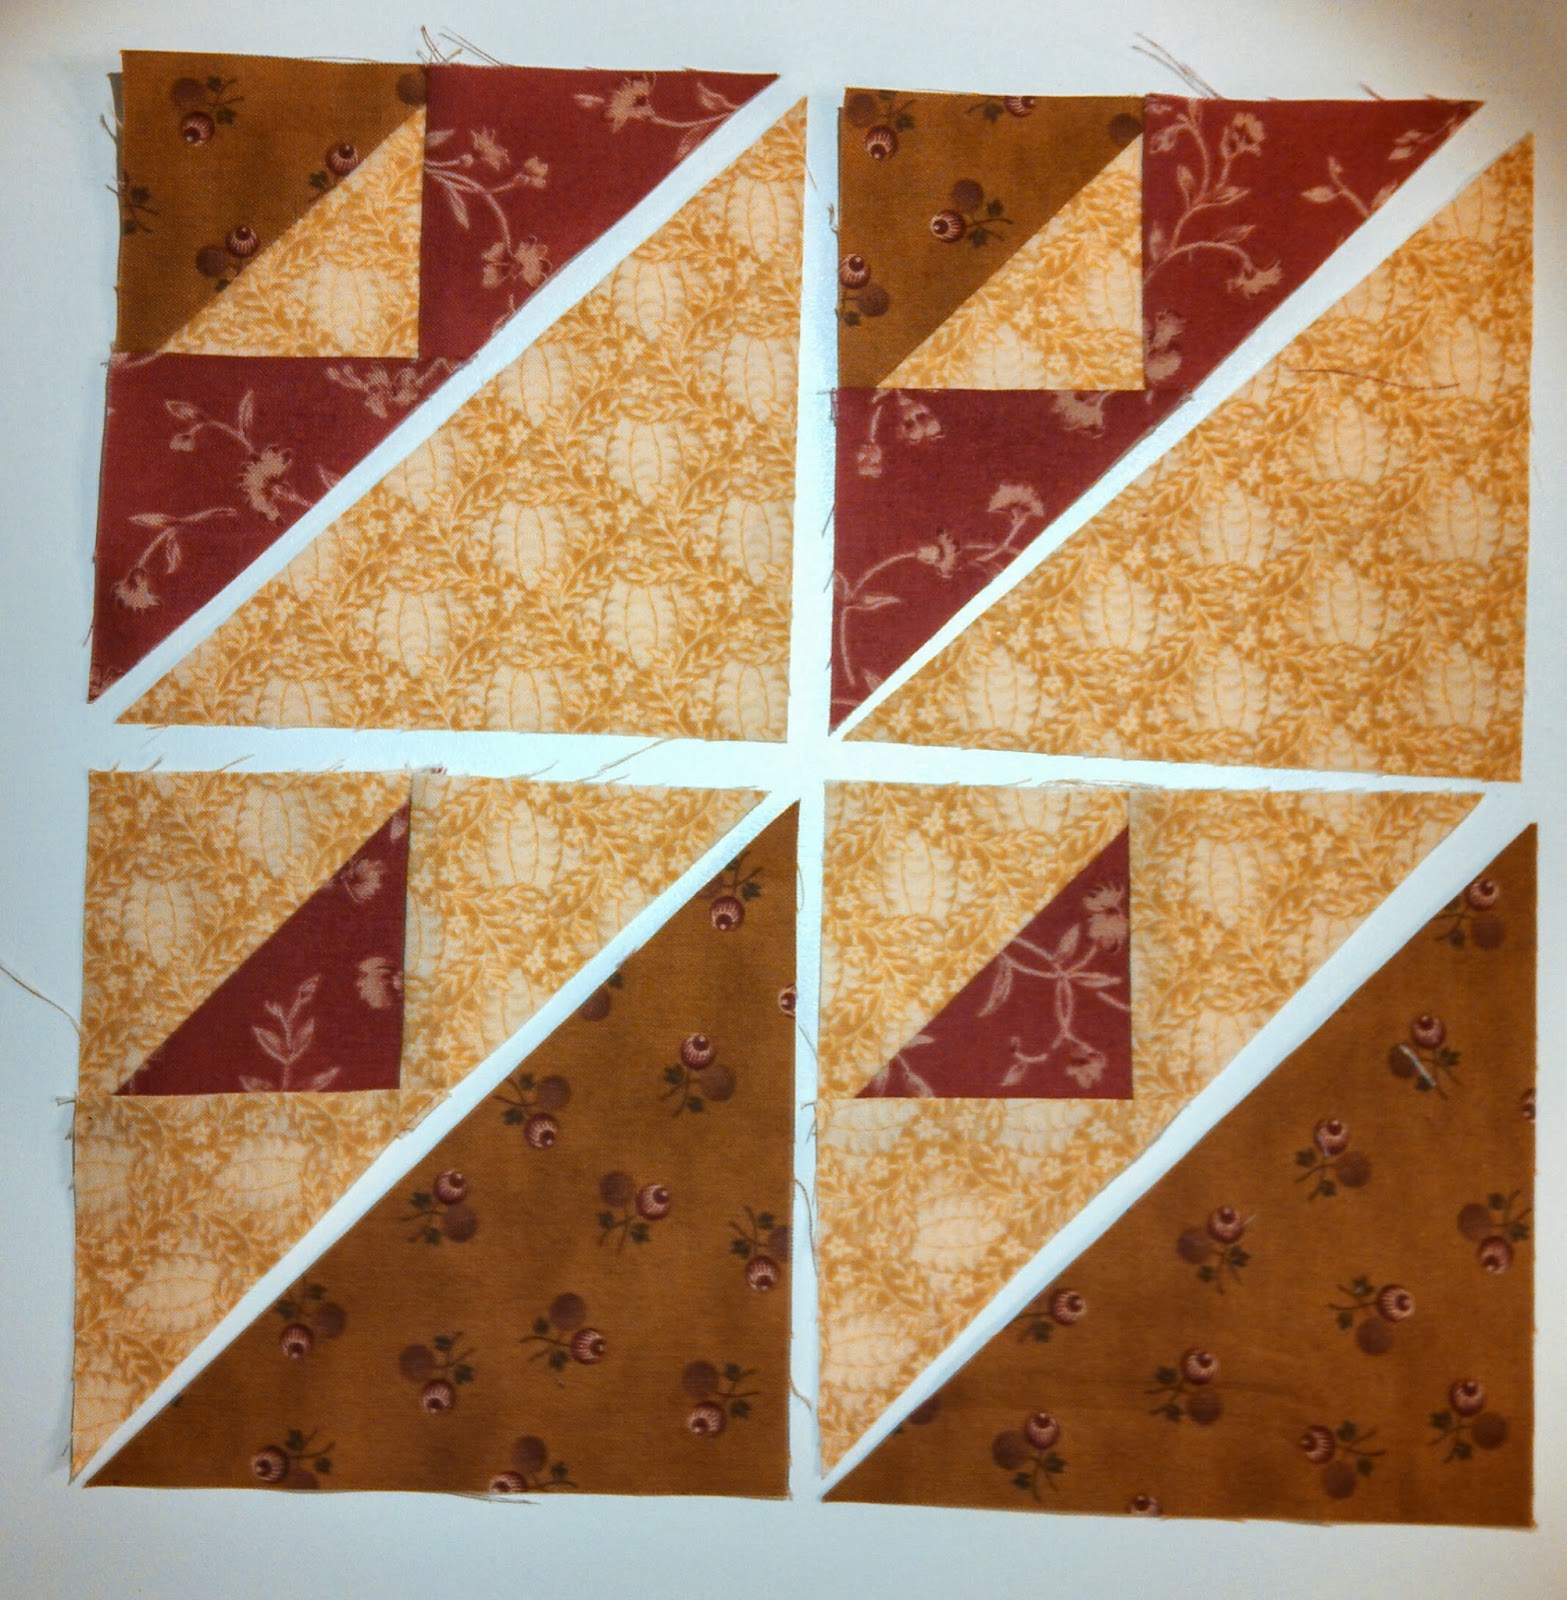
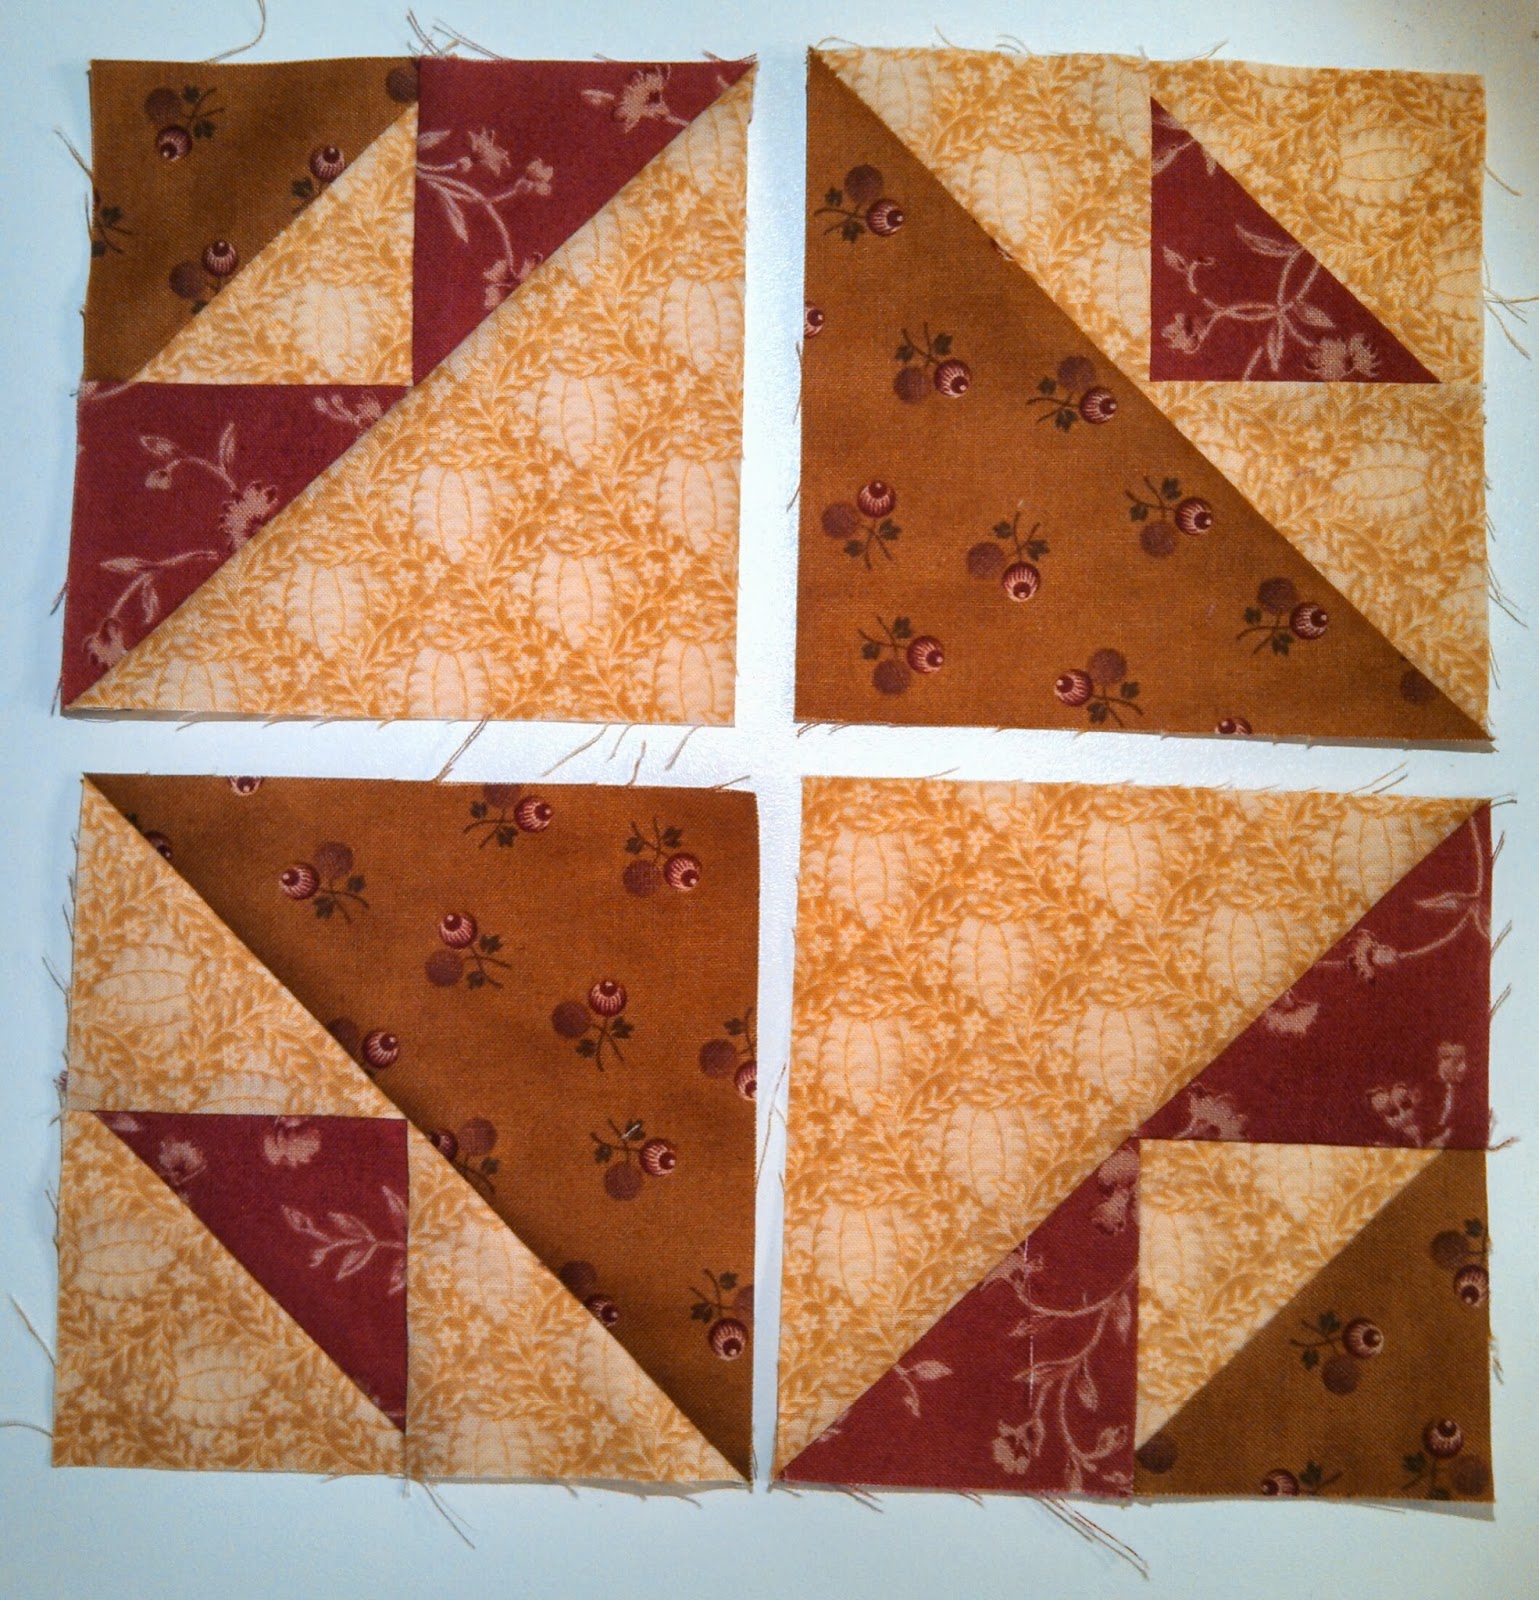
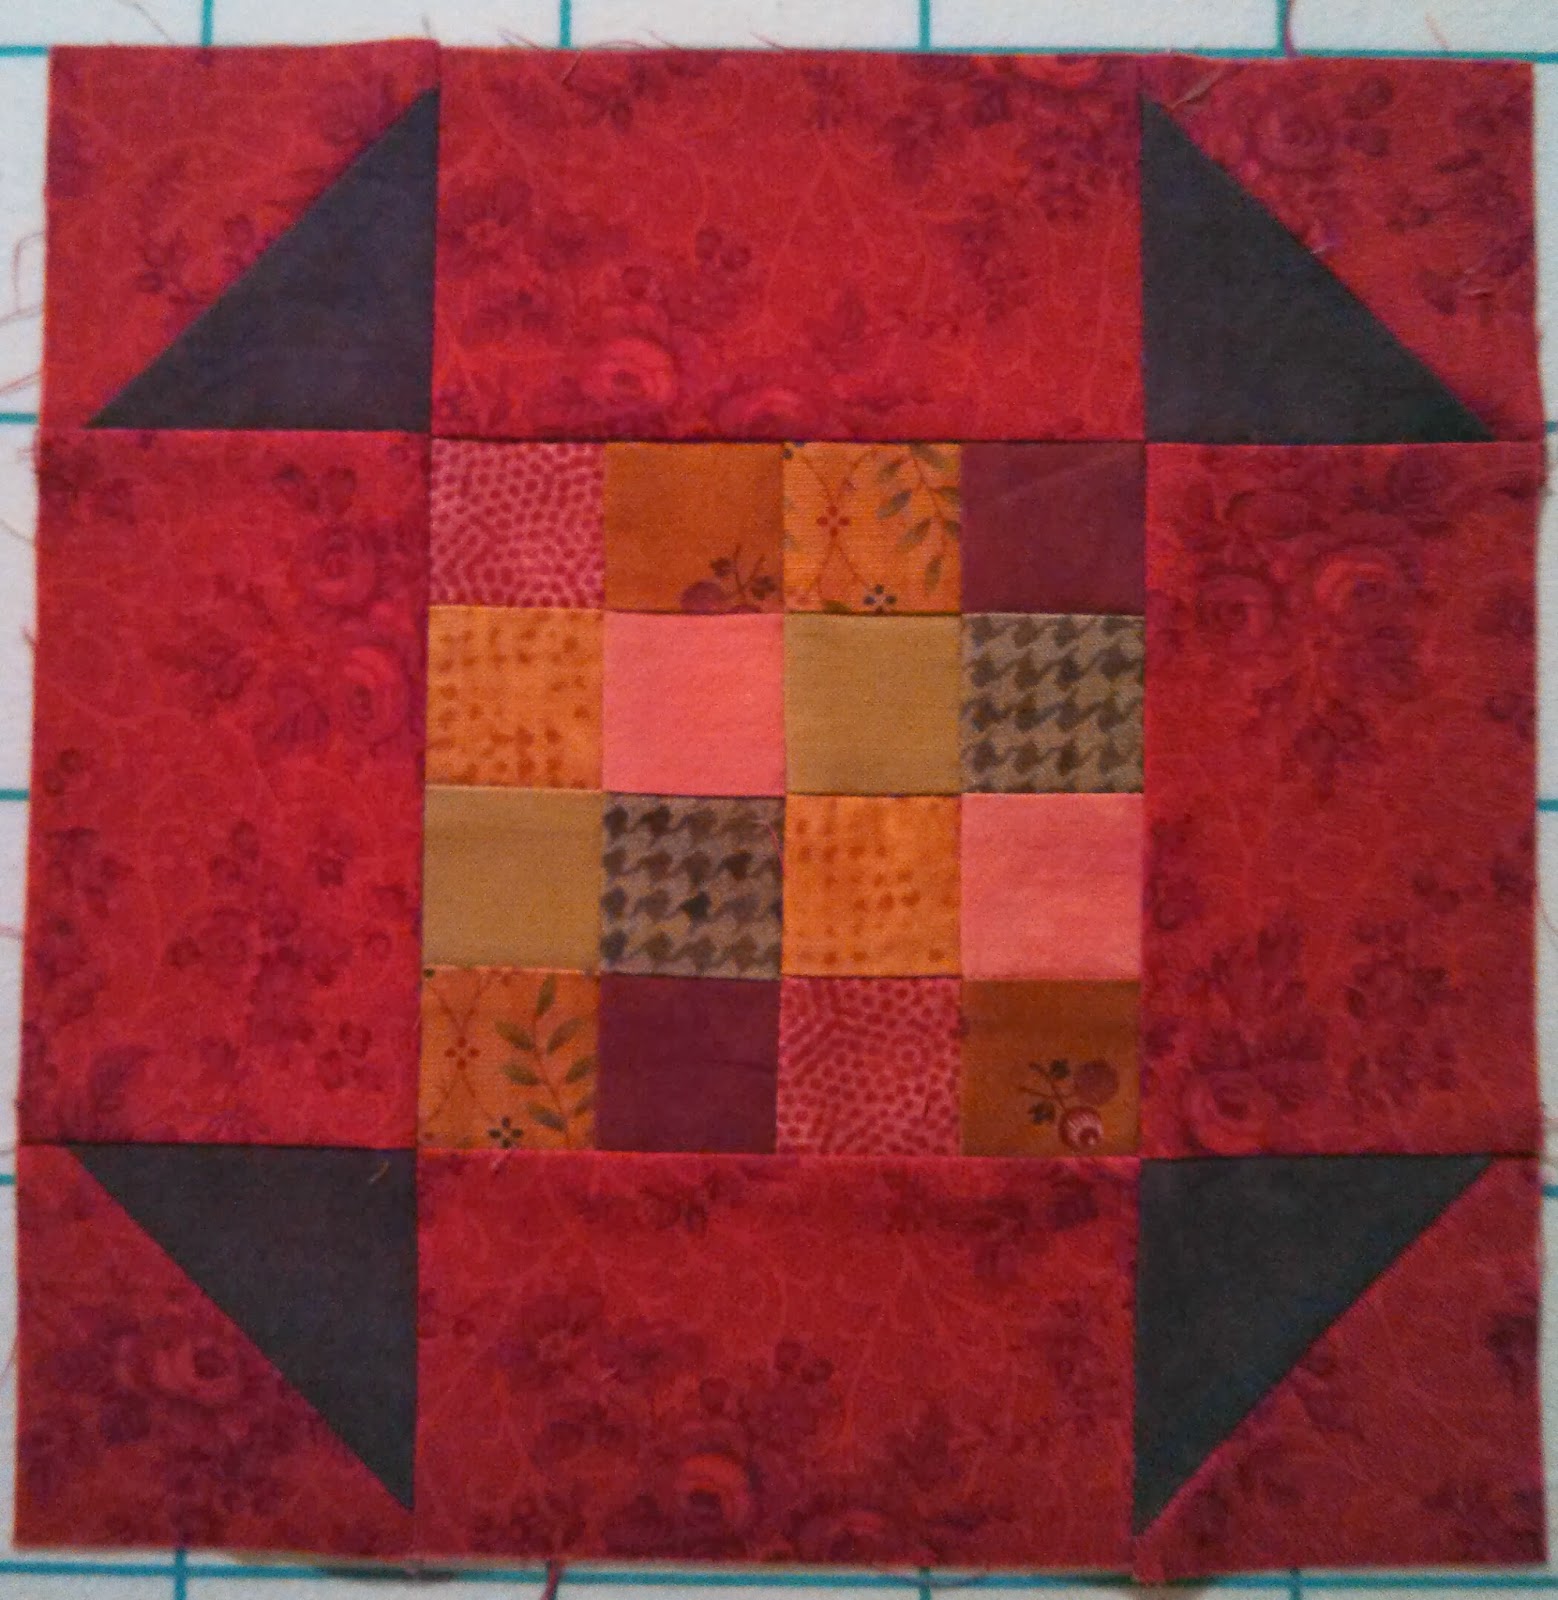
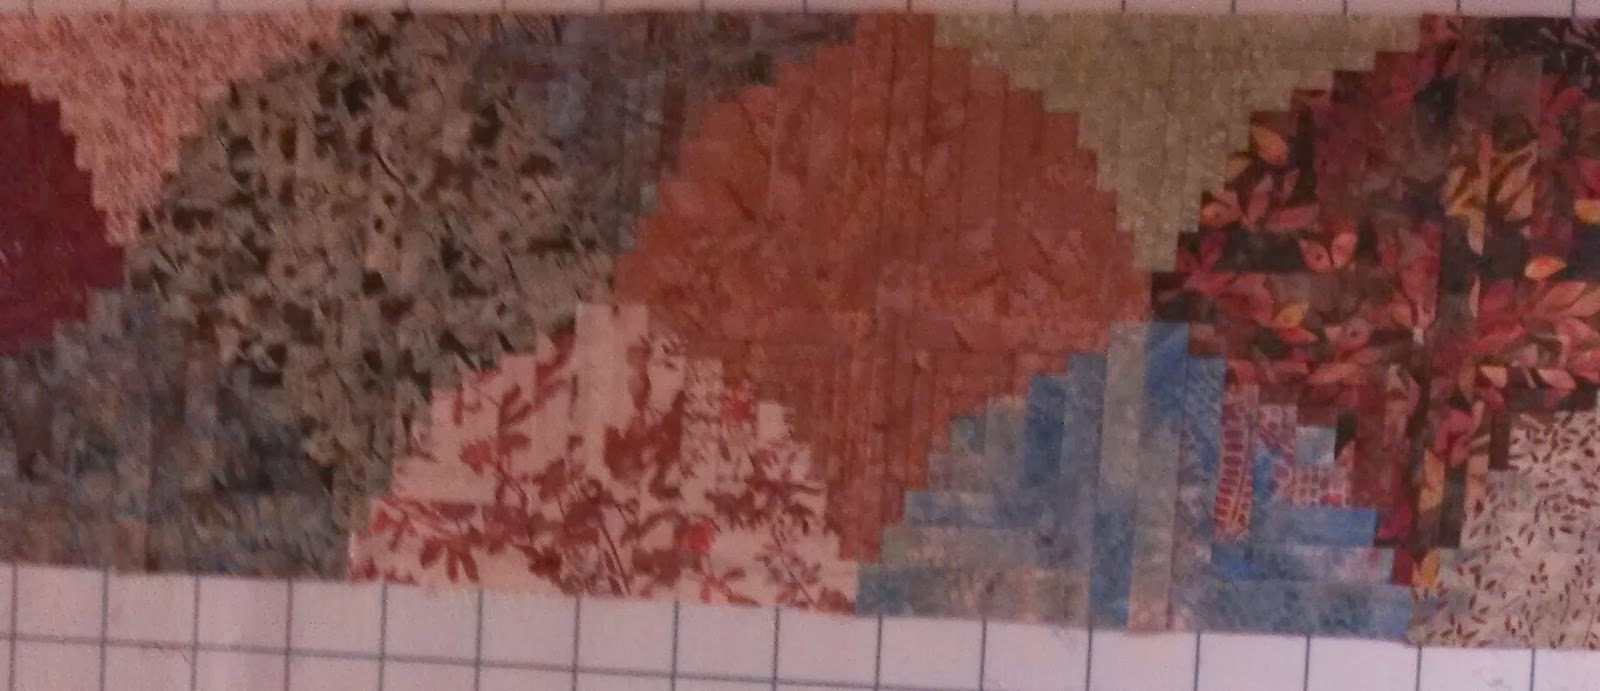
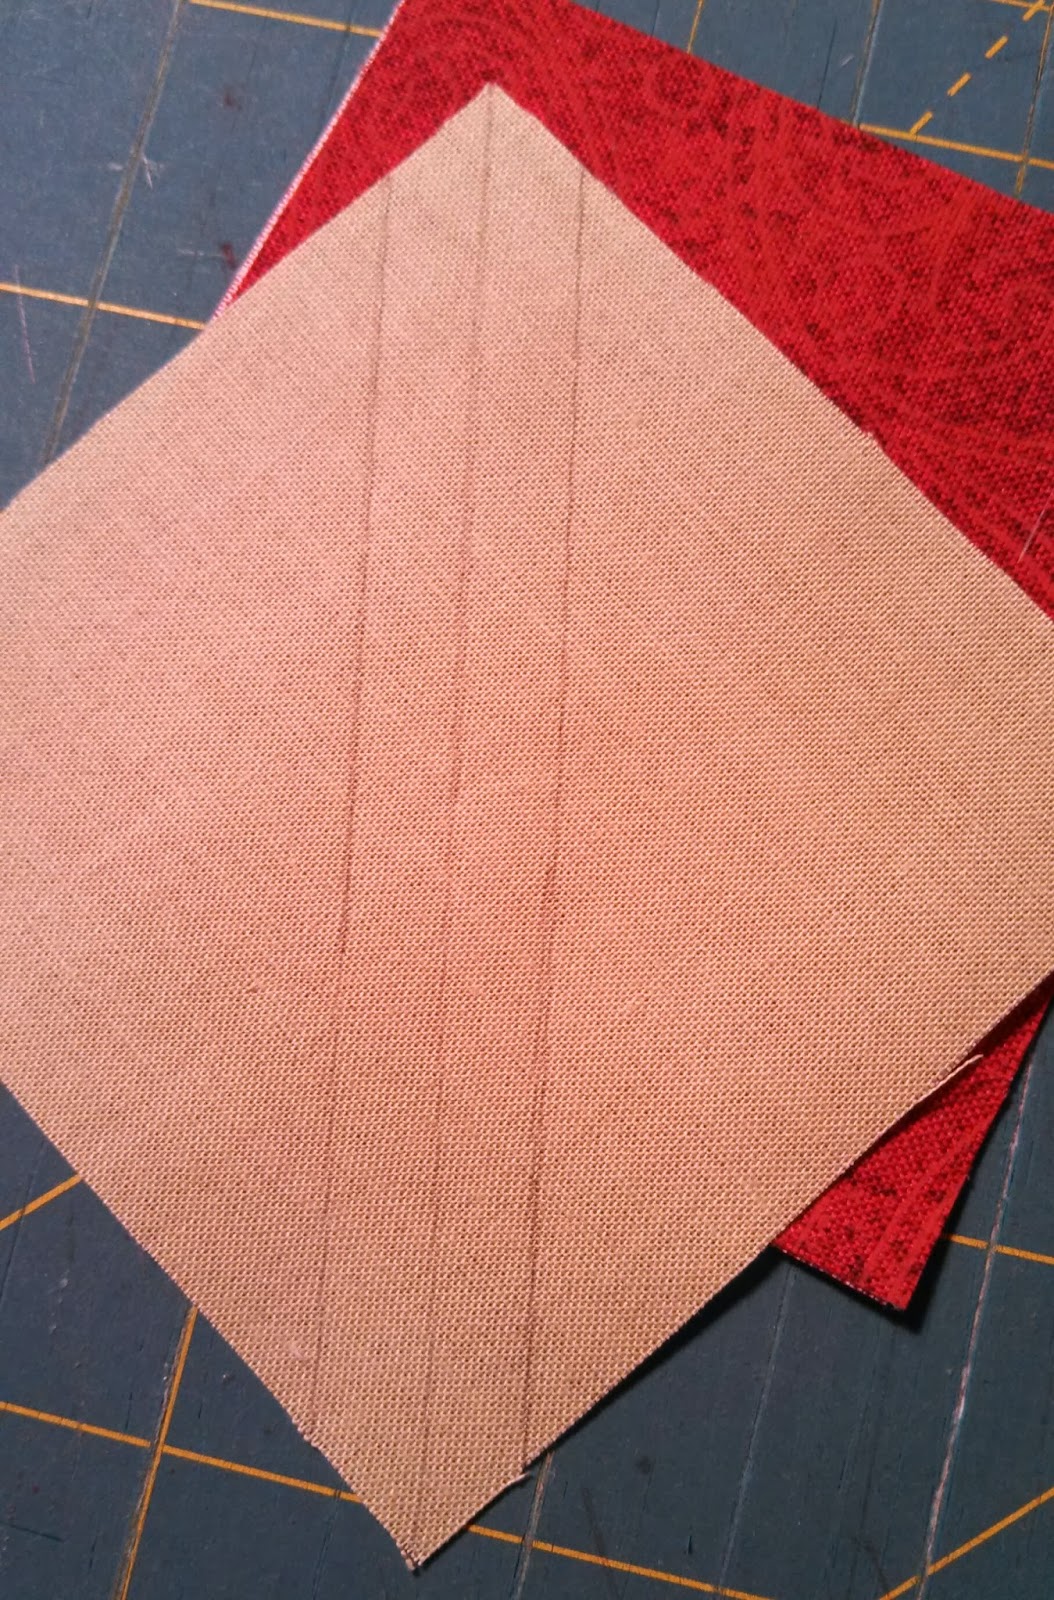
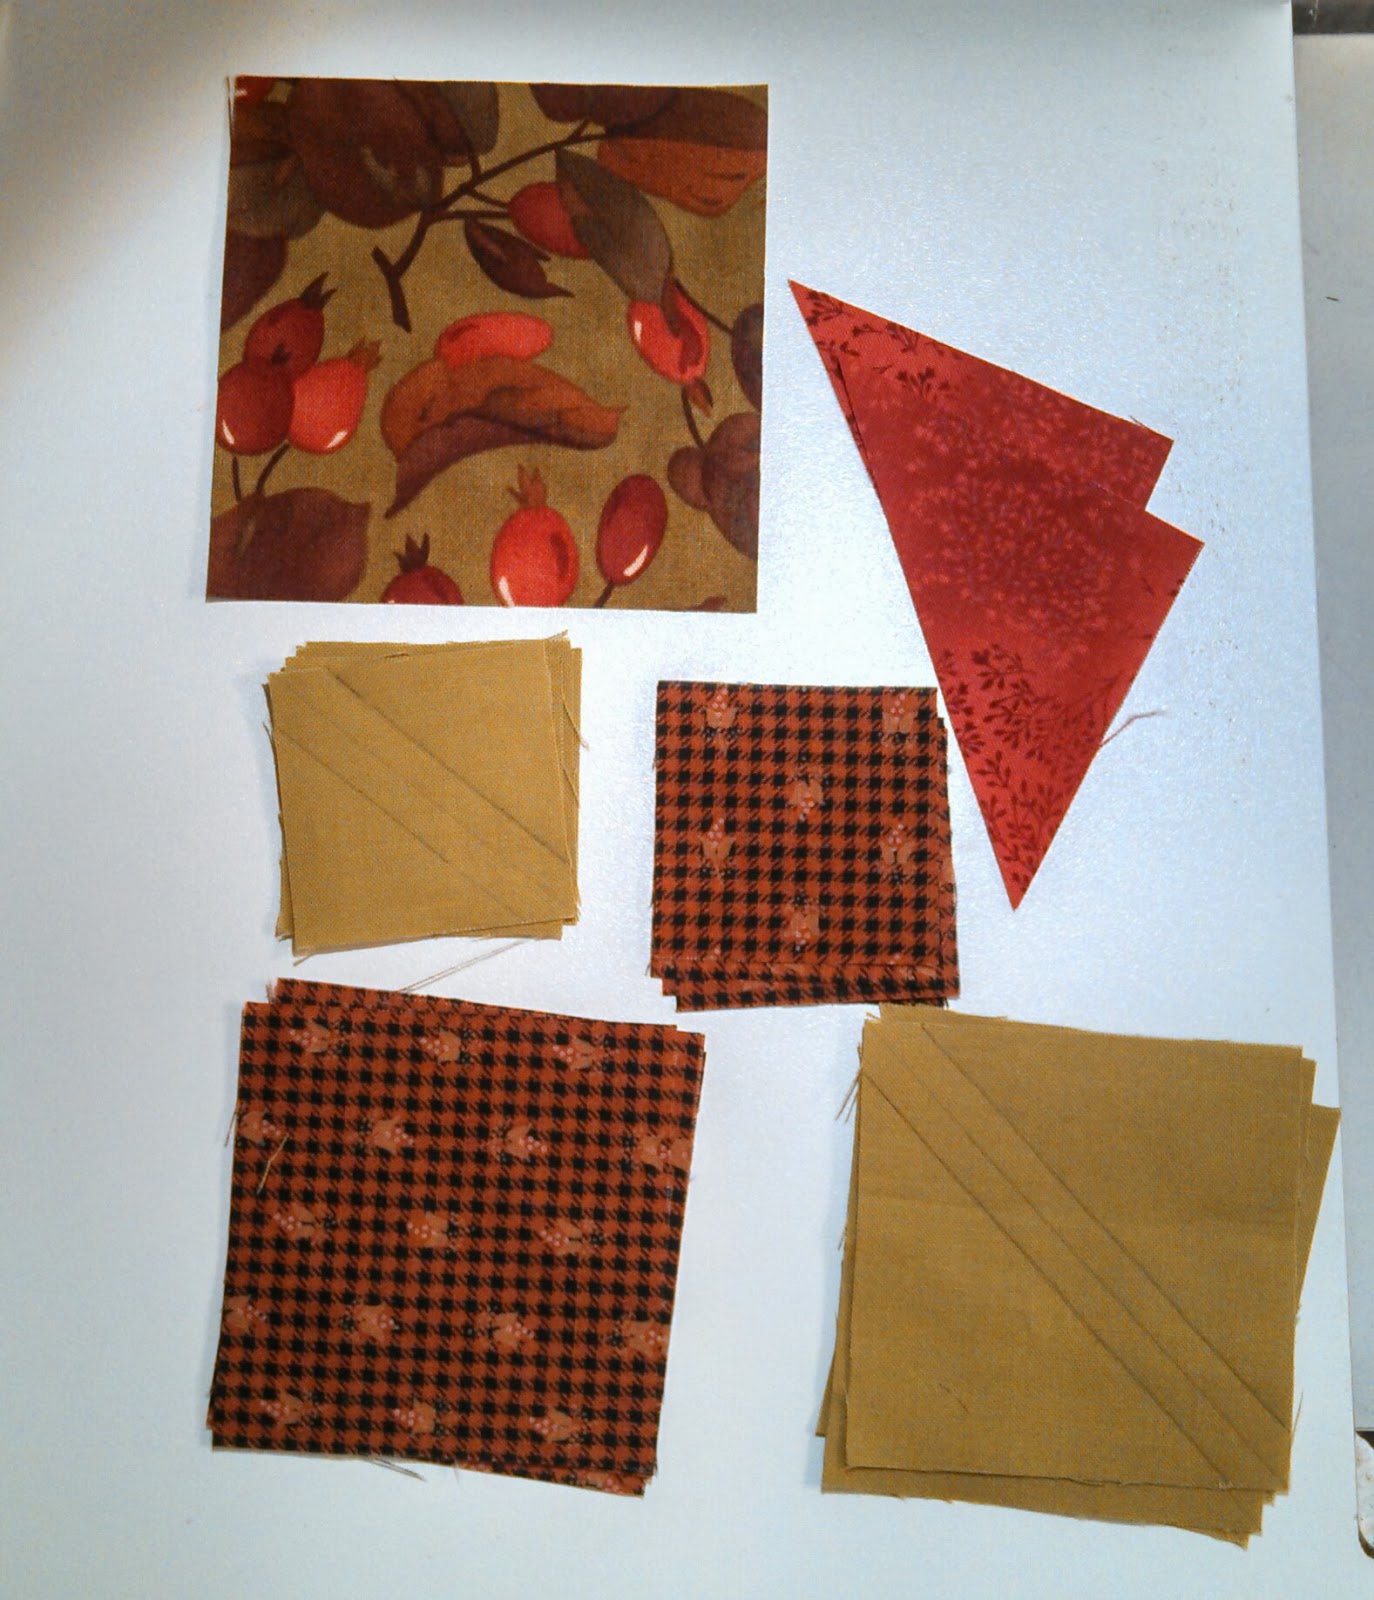
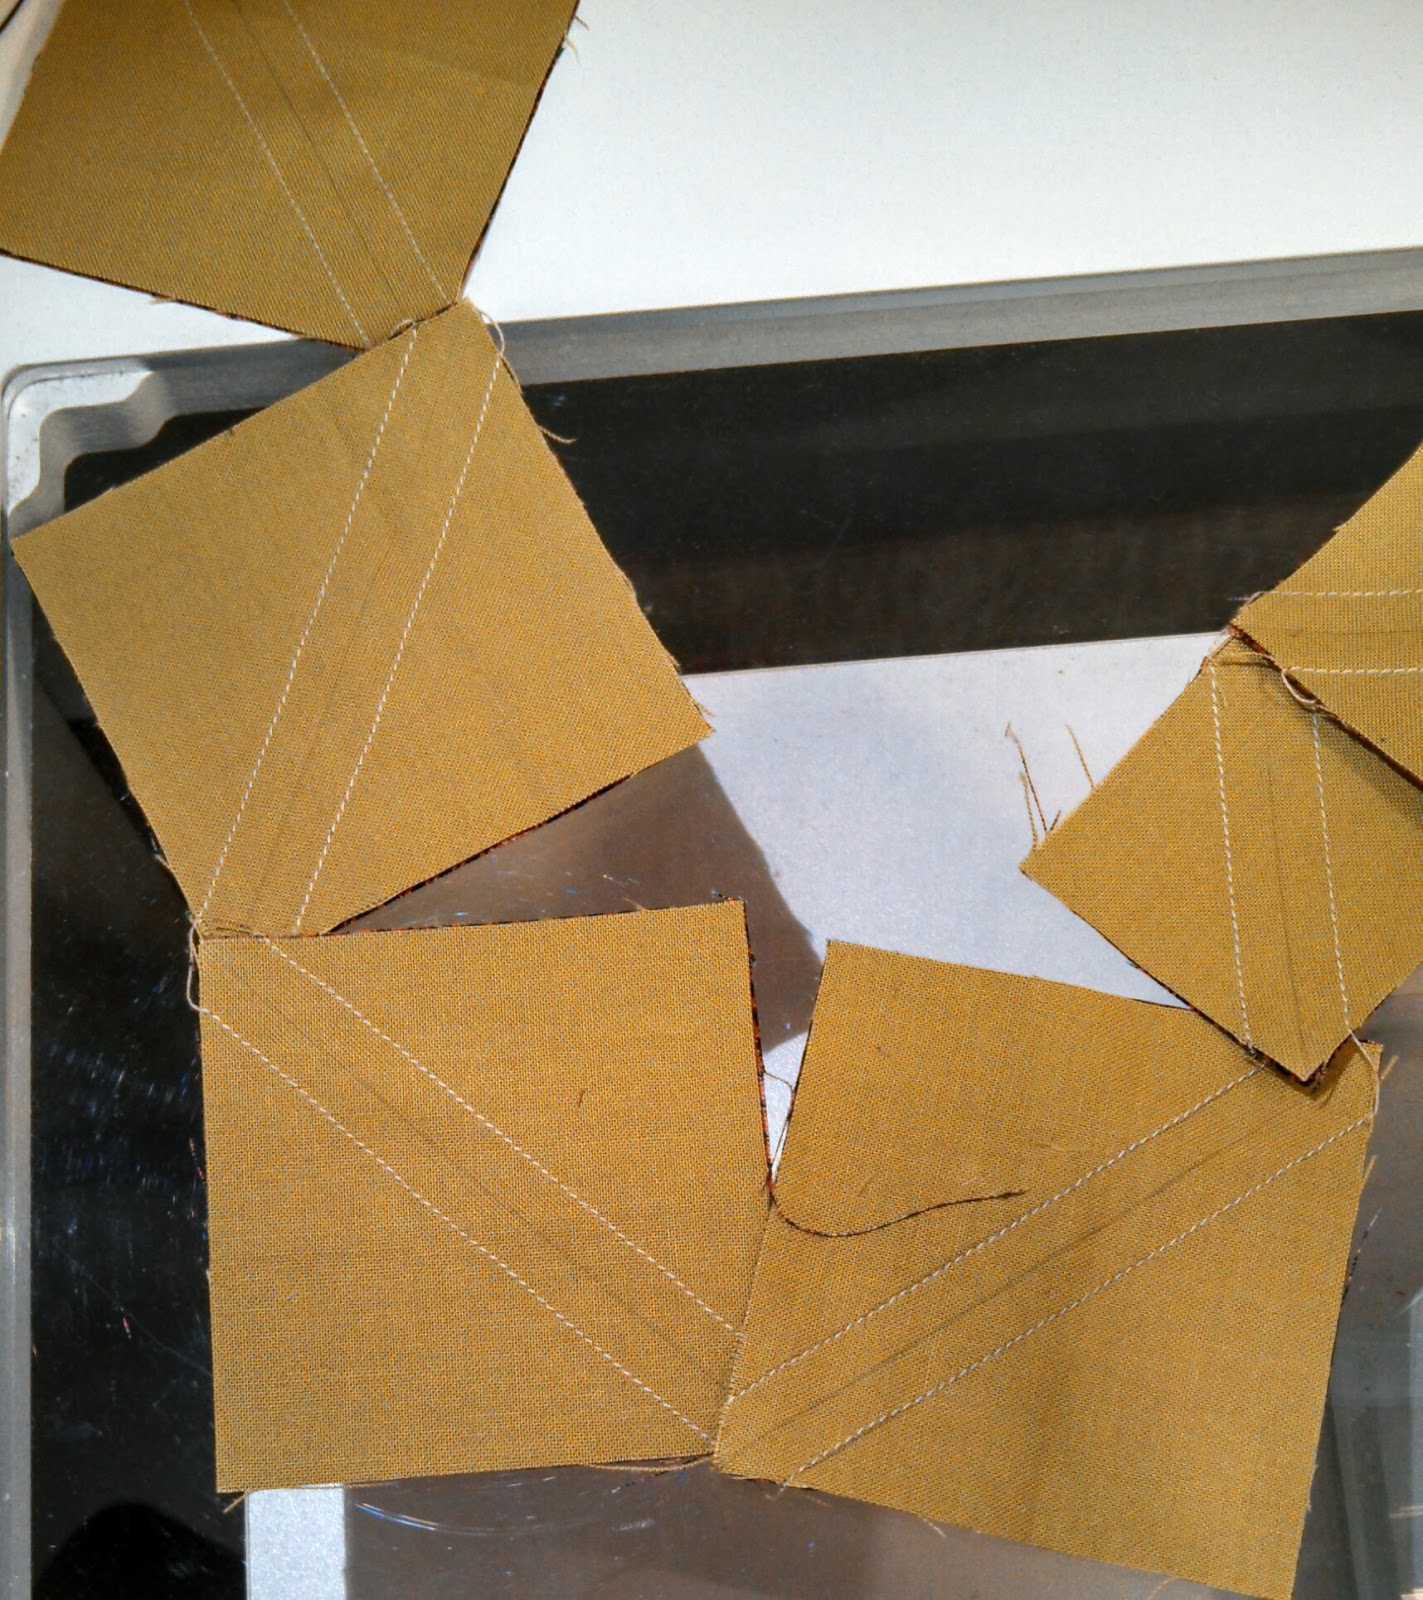
It was daunting at first, not because it was a difficult pattern but because I felt that I was treading on sacred ground, or fabric as it were.  This was to be a gift of love from a mother to her son and as I looked, studied and tried to understand what I was to do to complete it I felt that mother's love and determination to finish.  The top was in varying degrees of completion and she had left a few drawings and templates so I had a general idea of what to do.  Staying true to what she was doing and keeping it as close to original as I could I finished the top this week.  What an awesome honor!  It will be packaged and passed on to her son for Christmas!  This is one time I am glad that I answered "yes".

Working on the quilt made me think of my own children and was certainly missing them this week.  I will soon be a mother-in-law and trying to contemplate what that will be like.  For all you mothers of sons with wives what advice would you give to help me be a good, affirming and loving mother-in-law?

The snow is falling, it is terribly cold and I think I'll make some hot chocolate!

Blessings to you all,

Dee

Send those sew-a-long pictures to me!  Would love to see your progress.

Many gifts come swathed 
In paper,
A work of art.
The best gifts come sheathed
In skin,
A work of the heart.

Tuesday, December 3, 2013

Sampler Sew-Along Block #7


Step 1:  Choose 3 colors for this block or make it more scrappy than I have.  You will need 1 light, 1 medium and 1 dark.

Step 2:
Cut one 4 7/8" block from both the light and the dark fabric.

Cut four 2 7/8" squares from the light fabric

Cut three 2 7/8" squares from the medium fabric and 

Cut one 2 7/8" square from the dark fabric

Step 3:  Mark two of the light 2 7/8" and the light 4 7/8" squares to make half square triangles.


Step 4:  Putting right sides together make the HST's as shown above.

Step 5:  Cut the medium 2 7/8" squares in half diagonally and the remaining two light squares in half diagonally.


Step 6:  Lay the blocks out for piecing as shown above.  You will need two of each.

Step 7:  Piece the four quadrants and lay out as shown below.


Step 8:  Sew the four quadrants together as shown above.

Enjoy!

Wednesday, November 27, 2013

It's That Time of Year

There is a soft and gentle snow falling outside, a warm cup of tea in my hand and a schmaltzy Hallmark movie on TV.  Somedays it just doesn't get any better than this.

Today was fun.  I spent it sewing at the store, getting all the kids clubs projects sewn for the next quarter.  Sewing on the new Bernina 750 wasn't too bad either.  Lovely machine.

If you are traveling over the weekend please be careful and if traveling by plane may your delays be minimal and your Thanksgiving with family and friends a delight.  To each of you I want to say thank you for all your support, friendship and love.  It has meant the world to me and I am so thankful each of you have been a part of my life.  How blessed I am because of you.

Happy Thanksgiving!

Saturday, November 23, 2013

Friends and Family

Hello from cold and snow flurrying Michigan.  I am having trouble getting warm today so I fixed a cup of hot tea and came to the computer.  I know this sounds a bit cheesy but just thinking about the many friends I have made over the years does warm my heart.

Spent the day yesterday on a road trip with some friends.  We visited the Bittersweet Quilt Shop in Pinconning, MI which is located in an old brick church.  It is a beautiful setting and such a delightful array of fabrics, antiques and home decor items.  I could have spent so much more than I did there.  They do have a website if you want to check it out.

I am doing some baking today for my niece so she will have cookies and goodies while she is here this week with us and plenty to take back to college with her.  Following is a recipe that our family enjoys in the fall and at Thanksgiving especially.  It is smelling wonderful in the house.

Our niece became engaged and the wedding will be in early August.  We are so excited for her.  That will be two weddings next summer and fall.  Our family is certainly changing and growing.  So Brett will not be the first cousin to marry after all.  His wedding plans are coming right along.  So excited!

I have also just finished Emilie Richards new book "Somewhere Between Luck and Trust"  It was an engrossing fun read.

Enjoy the recipe and know you are loved and appreciated!
Dee

Pumpkin Dessert

1 lg. can pumpkin
1 cup sugar
1 lg. can evaporated milk
1 tsp. cinnamon, plus additional spices listed on pumpkin can
3 eggs

Butter and flour 9x13 pan.  Combine above ingredients and pour into pan.  Sprinkle yellow or spice cake mix over top.  Add 1 cup chopped walnuts and pat down.  Melt 3/4 cup butter and drizzle over top.  Bake 350 degrees for 1 hour.  Cool 10 minutes and frost.  You can leave in pan or invert on platter to frost it.

Icing
1 8 oz. cream cheese
1 cup powdered sugar
1 sm. tub Cool Whip

Cream together and spread on dessert.  Wet knife for easier spreading.

Tuesday, November 19, 2013

Sampler Sew-A-Long Block #6


Step #1:  Cutting Instructions
               For the center of the block you will need an assortment of 16, 1 1/2" squares.  You can make strips and subcut or sew them individually.  (I chose to make two 3 1/2" x 1 1/2" strips of different fabrics and subcut to make my center, which repeats each strip once.)
               Cut two 2 7/8" squares from a dark fabric for HST's
               Cut two 2 7/8" squares from a medium to med. light fabric for HST's
               Cut four 2 1/2" x 4 1/2" rectangles from the med. to med. light fabric used for the HST's.


Step #2:  Make the half square triangles.  Lay the two med. and dark fabrics right side together and mark for sewing.  Sew together 1/4" on either side of the center cutting line and then cut apart.  Trim the bunny ears.

These are the components you should have for making the block.

Step #3:  Sew the half square triangles to the ends of two of the 2 1/2 x4 1/2" rectangles.  See below.


Step #4:  Sew the remaining two rectangles to the sides of the 16 patch center.  See below


Step #5:  Sew the rows of the block together as shown below making sure your seams line up.


Enjoy!  Please send pictures of your completed blocks.  They can be emailed to me.  Would so love to see your progress.


Friday, November 15, 2013

Turtle Progress


Fall has ended and Winter is here even if the calendar doesn't agree.  We had our first snowfall on Wednesday this week.  We were glad that we got our leaves raked before that happened.  The pipes are winterized, flower beds put to rest and the soup kettle is on.

Friends and I did a little shop hopping yesterday which was very fun but it also means I now have a few more projects added to my list.  The list seems to just get longer instead of shorter.  I've made good progress on Brett and Stephanie's ring bearer pillow, just waiting for more ribbon to arrive in the mail.

We are looking forward to having our niece Molly with us for Thanksgiving.  This will be the first time we will have her all to ourselves and are really looking forward to spoiling her a bit while she is here.

Today and tomorrow are long teaching days of which I am thankful.

Rejoice in all that you have to be thankful for and keep quilting!

Blessings,
Dee


Using the Sew Wonderful ruler for this one.  Need to get the rows sewn together and quilted.

Monday, November 11, 2013

Stashbuster Sampler Sew-a-Long Block #5


This is a fun and quick block called Spinning Waterwheel.

Step One:  Cutting Instructions
     
      From two complimentary fabrics cut a 1 1/2" strip by WOF for the corner four blocks
      From the darker fabric from above and a light fabric cut 4,  2 7/8" squares for the half square triangles.
      From a print fabric cut one 4 1/2" square for center piece.

Step Two:

     Sew the two 1 1/2" strips together and subcut into eight 1 1/2" strips.  Sew together to make 4 four patches.  
      Mark and sew to make the eight half square triangles.


Step 3: Sewing the rows

     Sew the rows together as shown in the pictures.


Enjoy and Happy Sewing!
Dee


Monday, November 4, 2013

Busy! Busy!

It warmed up to the upper 40's today.  Yahoo!!!!

I stayed inside for most of today and sewed, sewed, sewed.  One hundred curved seams, 50 half square triangles and 2 more rows of log cabin clamshells and I am so ready to call it quits.  What have you been working on?  Whatever it is, I hope it has brought you great joy!

I finished up a class last week on ribbon embroidery and decided to see if my son and his fiance' would like me to make their ring bearer pillow.  I started designing what it would look like last week and got the word that I can give it a go.  I will keep you up to date on how I am doing.  I am very excited to get started.

Here's hoping your days are filled with love, warmth and sunshine!

Dee

Wednesday, October 30, 2013

Stashbuster Sampler Sew-a-Long Block #4

This block is called Rolling Star.  Basically it is a variation on the Ohio Star.
Fabric Requirements:
Gold Fabric:  1 scant 3 3/8" square for center, 8 - 2 1/2" squares for star points
Red Fabric:  2 - 2 7/8" squares cut in half diagonally once
Tan Fabric:  2 - 2 7/8" squares, 4 - 4 1/2" x 2 1/2" rectangles
Green Fabric:  2 - 2 7/8" squares.
Step 1:  Mark the back of your green and tan 2 7/8" squares to make half square triangles and mark the back of the 8- 2 1/2" squares with a diagonal line which will be your sewing line for the flying geese 
units.  See markings in the picture.

Step 2:  Sew the half square triangles together and cut apart on center line and sew the flying geese units.  Be sure to save time and thread by chain stitching.


Step 3:  Sew the center square-in-a-square together, sewing first on opposite sides, pressing and then sewing on the other two sides.  Be sure to clip your bunny ears.


Step 4:  All of your block units should be ready to sew together at this point.  Sew half square triangles to either side of two of the flying geese units.  Sew the remaining two flying geese units to either side of the square in a square unit.  Press seams open to reduce bulk.

Step 5:  Sew the 3 units together as shown in the picture at the top of the page.  Again, press the seams open to eliminate bulk in the seams.


Monday, October 28, 2013

Here It Comes!


Thought I should share my morning walk with you.  It was beautiful today and the air had a bit of cold bite to it.  The rain is suppose to be coming by nightfall or tomorrow and turning colder.  Yup, that white stuff is on its way.  Not sure if I am mentally ready for it or not but I know it will come whether or not I'm ready.  I appreciate so many of the people here who absolutely love the snow and are waiting impatiently for it to come.  I wonder if any of them would come and shovel our driveway every morning around 6 a.m.?

There are way too many irons in my fire and several projects I'd like to get going on.  I'm going to restrain until I have at least one of the five done.  I have a full week of teaching ahead and will be working on the next block for the sew a long.  It should be up in the next day or so.

RETREAT TIME is approaching.  There are a few spots left in the February retreat in Sonora/Tuolomne.  Let me know if you are interested and I will get the forms out to you.  For information check the retreat button at the top of the page.  Deposit is due Nov. 15.

Rejoice in each and every day!

Dee

Wednesday, October 23, 2013

Dancing Fairies!!!


Don't know if you ever read the book "Where the Red Fern Grows" in school but there is a scene in the book about fairy rings.  Legend has it that when you find mushrooms growing in a circle in your lawn that the fairies were bringing good luck and happiness to you as they dance away the night.  Here is a partial shot of the fairy ring I found this morning.  I didn't even get it all in the picture because it was fairly large.


After that happy childhood memory I cleaned house for awhile and then headed to the quilt studio to work on my log cabin clam shell.  Here is what I was able to accomplish today.  Hopefully you can see the log cabin blocks.  I love log cabins because there are so many things you can do with them.


The temperature is dropping and the leaves are starting to fall in abundance.  The sweaters and long sleeves have come out of the closet.  I wasn't really done with the warm weather and beautiful days quite yet but here we go late fall and the start of winter.

May your days be filled with warmth and love,
Dee


Saturday, October 19, 2013

Sew-a-Long Block #3


This block is called Road to Home:  The materials you will need are 2 strips - one dark and one med. light that are 2 1/2" by approximately15", Four 2 1/2" squares that are med. dark, Two squares 2 7/8" that are med. and Two squares 2 7/8" that are light.

Draw sewing and cutting lines on the back of the Two light 2 7/8" squares.  Sew right sides together and cut apart to get 4 half square triangles.  Be sure to snip the bunny ears.


Next, you will sew the two strips together and subcut them into 2 1/2" units.  You will need four of them.  Sew together to make four patches.

Next, you will sew the half-square triangles and the squares together to form four patches as well.  Be sure to press seams in opposite directions so that your seams will butt up against one another.  Sew the blocks together according to the picture below.
Enjoy!  Remember to send pictures of your finished blocks.  Would love to see and share them.

Dee

Wednesday, October 16, 2013

Prep Work

When it is time to quilt I want to sit down and get right to work.  The cutting, the reading, the measuring, the ironing, etc. is not generally my favorite parts of the process, the sewing is.  Are you a bit like that too?  Time and again I have regretted jumping in without doing all of my "prepping".  Therefore, reluctantly I am encouraging you to take the time to do some prep work of your own before jumping in.  Here are some of the things that I find helpful when considering a new project:

1.  After deciding on what it is you want to make and for whom or what, read the entire pattern instructions or sketch out your own pattern.

2.  Look carefully at the blocks in your pattern to see what you want to emphasize and that will help you determine your lights and darks and how many of each you will need.

3.  Choose a color scheme.  Once you have determined that, head to your stash to see if there is a theme fabric you want to use for your palette.  If it is there, do the happy dance, and then see what coordinating fabrics you already have.  Now it is time to go shopping for the rest.

4.  Figure out what amounts you still need and the values you need before heading to the quilt shop.  Buy what you need and of course do a little stash adding if you must.  There is always a fabric that calls out to me from the shelves.

5.  Once home, wash and iron your fabrics if that is what you do.  Check over all the cutting instructions a second time and then go to work on the cutting part.  I always cut for only one block first and give the block a test run by sewing it to make sure the pattern is correct and I like what I have chosen.  If all that is good I get down to business and do some chain stitching and what I like to do best- sew and watch the quilt appear under my hands.


Here is the start of my prep work for a log cabin variation quilt.  It looks like I could use a few more darks to make it really pop.  I'm ready to cut and get this quilt underway.  I get so excited over new projects.

May your days be glorious and filled with joy!

Dee

Saturday, October 12, 2013

Enjoying the Bounty

The last of the tomatoes and cantaloupe have been picked.  We have sure enjoyed both recently.  I still say there isn't much better than picking a warm tomato right off the vine and eating it.  The cantaloup weren't very big (I did plant them in a kiddy pool) but they sure were tasty.

Quilting the last week continues to be mostly prep work for classes which is a good thing but I'm ready for a little break to get busy on some projects that have been patiently waiting.  A new pattern is taking form in my head, and as one of my daughter's kindergarten students said, it needs to come out.
It will be hard to work inside tomorrow I'm sure.  The weather has been glorious and the fall colors are really coming into their own.  A neighbor has a pair of sugar maples that are breathtaking as they change from eye popping yellow to orange.

What have you been busy with lately?  Whatever it is I wish you joy in the process and satisfaction in the completion.

Blessings,
Dee

Tuesday, October 8, 2013

Sew Along-Block #2

Whew!  There have been some crazy busy days since returning from CA.  I am happy to have block #2 ready to go.

Pinwheel Dance
You need 4 different fabrics

Fabric 1- the background (green) cut 4 squares at 2 3/8", cut 6 squares 2 7/8"

Fabric 2- (plaid) cut 4 squares at 2 3/8,  cut 3 squares at 2 7/8"

Fabric 3 - (coral) cut 1 square at 2 7/8" and cut in half diagonally

Fabric 4 - (center print) cut 1 square at 3 1/2"

Step 1:  Cut all of your individual pieces.  Draw your sewing lines on the back of the 4 small green squares for the half square triangles in the pinwheels and draw them on the back of 3 of the larger squares for your half square triangles.


Step 2:  I recommend chain stitching all of your half square triangles, cutting apart and pressing.  Clip the bunny ears.

Step 3:  Assemble your pinwheels as shown and sew together.  You will have two when completed.

Step 4:  Press your pinwheels by opening up the center and laying it flat as seen in the picture.  This eliminates the bulk and will make it easier to quilt over as well.

Step 5:   Cut the remaining 3, 2 7/8" squares in half diagonally.  Assemble the half square triangles and the triangles as shown.  Sew together in rows.

Step 6:  Sew the pinwheels to the opposite sides of the 3 1/2" square.  Sew the half square units to each side of the center unit.  Complete the block by sewing the remaining triangles to the two corners of your block as per the picture of the block above.

I hope you are enjoying the sew along so far.  Please let me know how it is going for you and if I need to be more explicit with instructions.

Hopefully you are enjoying these beautiful fall days and crisp nights as much as I am.  Autumn is truly putting on a show here in MI.

Blessings and love,
Dee


Tuesday, October 1, 2013

Quilting in the Garden

I have returned from my CA trip and teaching at Quilting in the Garden.  The class was a lot of fun and met some very lovely ladies and reunited with dear friends.  How wonderful to have seen so many beautiful quilts and even lovelier friends in the garden on Saturday.  My daughter LeAnna and I were amazed at the detail and beauty of the quilts this year.  We also enjoyed our time and conversation with John and Alex Anderson.  It was especially cute that LeAnna was able to sign one of Alex's kids books that she was privileged to be in a few years back.

Meeting with my son, his fiance and her mother and grandmother to see their wedding venue and help them with wedding planning was one of those once in a lifetime moments to cherish.  So honored to be included in that.

Today's special treat is beauty tips from my amazing, beautiful and talented niece Melody.  May you enjoy them as much as I do.


If people don't like foundation or concealer - .you should try "beauty balm" or BB cream for short. It has a moisturizer and a tint of color and it covers up great.
 
You can use coco powder as a bronzer on your cheeks and it is totally inexpensive!
 
If you paint your nails and want a matte finish instead of shiny - just put your nails over the steam from boiling water and hold for about a minute or until the "glossiness" is gone...

May each of your days be blessed with beauty and solace.

Blessings,
Dee

Saturday, September 21, 2013

Me Time


August and September have been very busy months for me.  So the last few days with a multitude of things to do and no real desire to do them I pulled out a pattern I had picked up from a quilt show.  This quilt was captivating and reminded me of fall, home and afternoons spent with a good friend.  I threw caution to the wind and chose fabrics, and started making the 59 six inch squares it will take to complete.  AAAAhhhhhh it felt good.  Above is a picture of my first 3 blocks.  

Reality has now set in however and I am moving back at a slightly frantic pace.  I teach Sunday, Monday, Tuesday and on Wednesday leave for CA.  Today I am prepping for my Sun., Mon., Tues., classes and tomorrow I will get myself ready for the classes and time in CA.  I am so excited to be able to see my children again and some very dear friends.  Thank you LeAnna for driving up from San Diego to see your mama.  A big thank you to Melissa and Leslie at In Between Stitches for letting me play with all my CA quilting friends at your store, especially the night before a big quilt show.  You are awesome.

The leaves are turning color and the air feels different.  Fall has arrived.  Enjoy it!

Blessings,
Dee

Tuesday, September 17, 2013

Stashbuster Sampler Sew-a-long


The time has come to bust some more of my stash.  I'm inviting you along.  I will be making an 8 inch block every other week and posting a tutorial for you to follow along with me.

Step 1:  Open those stash bins, drawers, shelves or boxes and find a theme fabric to build your sampler
             around.  I started with 3 different fabrics and found as much fabric from the stash that I thought
             would work with each one.  I settled on a deep brown with red flowers.  I'm getting in the fall
             mood and thought it could also work as a Christmas possibility.
             Here is my final palette.  Obviously a lot more fabrics than I need but it will certainly open up                                  the choices for each block for me.

Step 2:  Time to decide which blocks I want to include.  I searched through my library, drew some on 
             my own and searched the internet.  There are a lot of possibilities but I hope that what I've 
             chosen will be wonderful.  My designing tends to be somewhat organic and develops as I work
             on the quilt so in some ways this will become a mystery.  (For you and me)

Step 3:  This is the block I chose for the first one.  It is a variation on the Ohio Star.

Step 4:  Fabric requirements:
             A - the white background - 5 1/4" square cut twice diagonally for the geese triangles and
                   four 2 1/2" squares for the corners
             B - dark gold for the snowball corners and star point triangles
                   four 1 1/2" squares,  two 3 1/4" squares cut diagonally twice
             C - brown for the star point triangles - two 3 1/4" squares cut diagonally twice
             D - peach for the center snowball, one 4 1/2" square
Step 5:  Sew the star point triangles together to form triangles.  You will need four of them with the
             darker fabric to the right and four with the darker fabric on the left.

Step 6:  Sew these units to the sides of the geese triangles to make 4 flying geese.

Step 7:  Draw a sewing line diagonally through the 1 1/2" squares and sew them to the corners of the
             peach snowball block.  Trim away the excess fabric and press.
Step 8:  Assemble the Ohio Star block according to the picture.  We're on our way!!!!!!!

If you have questions or need help please leave a comment or email.  I would love to hear from you and see your blocks as we progress.

Have a Happy!!!!!!!!

Dee

Tuesday, September 10, 2013

It's Coming!

The air feels a little different and the trees are starting to show signs of changing colors.  It's boggles my mind to think that it has been a year since arriving in Michigan.

The block sew along is also on its way.  Coming next week we will be starting our Scrappy Block Quilt.  I hope you are planning to join along.  I am determined to put a dent into my stash this year.  I am so ready to move out the old and bring on the new.

I received another recipe from my son.  He is becoming quite the little cook.  This one is quite good so I thought I'd pass it on to you.  Enjoy!


Dice red and green peppers and onions.  Put diced vegetables, can of corn and one can of black beans drained in frying pan.  Sear.  Onto a piece of flat bread pita layer BBQ sauce, diced grilled chicken and the seared vegetable mixture.  Bake at 325 for 10 minutes or until pita bread is crispy.

Looking forward to Quilting in the Garden!

Dee

Thursday, September 5, 2013

Inspired!


This little guy was crawling across my patio yesterday.  I had to go out and check him out.  You cannot tell from the picture but he is long and fat.  I was amazed by the vibrant lime green color and the small orange dots on his back.  Love that color combo.

Where else do you find color inspiration for your quilts and sewing projects?  I have several places I go to when I start a new project besides looking at green crawly things on my patio.  The cover of my favorite magazines are great.  They have a color scheme and usually give me a clue as to what color I want to use the most and least of for good balance.  Pictures and nature are two other places I look for inspiration.  With the changing of seasons the scene out my window is ever changing in color and hue.
The paint store is another good source.  The brochures they have for free offer a wonderful variety of palettes and finally pinterest offers up a slew of color combination posts.

In a couple weeks I will be teaching the quilt below at Quilting in the Garden, Alden Lane Nursery, Livermore, CA.  For those of you near there I would love to see you in class or at the show.  Look closely and you'll see the little green crawly things color combo in the quilt and flowers. :)

Be Inspired today!
Blessings,
Dee

Tuesday, September 3, 2013

Back To School

Labor Day is over and kids are back in school.  For me, the summer has simply flown by and it is hard to believe it is September and fall is around the corner.  Seeing the school bus this  morning gave my heartstrings a tug.  I do miss the excitement of getting the classroom ready and meeting the new group of kids and the anticipation of what a new year of school will bring.  I will just enjoy living it vicariously through my two children who are both teachers and recently experienced the excitement of that first day.  LeAnna experienced the high energy of both the parents and her kindergardeners while Brett enjoyed the tentative eagerness of high schoolers.  I am so proud of both of them.

Sewing was put on the back burner for the last couple of days.  Sunday I worked at the store in Ann Arbor and enjoyed dinner with friends.  Yesterday my husband and I visited the Outlet Mall and tooled around the countryside.  It was wonderfully relaxing.

Entering the quilt room this morning I realize it is time for some serious organization again.  Things have a way of migrating and not finding a permanent home.  It's because I am a piler and push-it-aside-er.  While walking through Ikea there were a number of organizing items that caught my eye.  They met the cuteness and practical test.  One was the Riktig curtain hooks and clothesline.  When I am working on sampler blocks I like to have them displayed so I can keep track of color and value theme.  This line with the adorable little clips would do the trick.  How fun to have a clothesline of your blocks hanging along your wall or you could hang your child's artwork there too.  The second item was the Fintorp series of buckets and hooks.  I can just see all my pens, brushes, rotary cutters, FQ's, etc.  beautifully displayed and easy to get at.

Here is hoping you had a wonderful holiday weekend and that you find inspiration to do the things you love.

Dee

Saturday, August 31, 2013

New Projects

I got a little caught up with some things that were needing to get done so I had the pleasure of starting some new projects.  Doing one project at a time doesn't seem to be the way I roll so of course I had five different things going at the same time today.  

4 of the 5 projects I worked on today


I started the quilt using the ruler I picked up at In Between Stitches during our vacation in CA.  It is the block on the far right.  I am also making a pineapple quilt which is at the top.  I was chaining both of them and just plain got tired of watching the fabric go under the foot so I took a break and read my latest copy of  "The Quilt Life" and then cut out a purse for my niece Melody.  Had enough fabric left over to make a matching pillow case.  That was enough procrastinating so back to chaining and managed to get a big chunk of both quilts pieced.


Tomorrow is a work day at the Ann Arbor Sewing Center.  I am looking forward to that and after work dinner with some friends from the University.

I pray all of you are having a wonderful holiday weekend with family and friends.

Blessings,
Dee

Tuesday, August 27, 2013

Speeding and/or Speed Sewing


There is a bill being put before the state to increase the speed limit to 80 mph.  It is also known that freeways deaths are most often caused by speed.  The very interesting thing about this is the group of people who are wanting this law passed.  The group would be the highway patrol because this would lower the number of speeding tickets they would have to issue.  I will let you come to your own conclusion on that one.

A question was asked in one of my classes recently about speed quilting and a discussion ensued about what speed quilting was.  Some thought that it was piecing without pins and going as fast as you could to get done, others had no idea and then there were the experienced piecers who knew what speed sewing was all about.  There is that type of sewing where you just want to get things done and you do not take the care needed to cut, pin and press appropriately.  Most of the time that kind of sewing doesn't get us the results we hope for.

For me. I read the pattern completely through so that I understand how to put it together and then assess if there are some ways I can take some shortcuts to make the task go quicker.  Can I chain piece any sections of the blocks?  Will it help me to cut everything first?  Should I make a sample block first to know how the block goes together?  Once I've made those decisions I can get down to work and chain piece saving myself time and thread.  So, I'm not really speeding but I am moving the process along quicker and more efficiently or what some would call speed sewing.

I've been teaching quite a bit lately and working in the community gardens so the sewing has taken a back seat this week.  I am working on a pineapple quilt and am over 2/3 done with it.  (See the picture above of my chain piecing?.  Tomorrow I will start another store sample.    I'll post some pictures soon.

"In this crazy quilt of life
I'm glad each of you are in my block of friends."

Dee

Wednesday, August 21, 2013

Growing and Sewing


My melons are growing, albeit slowly.  It has been a cool summer and a late planting on my part kept them from ripening when they should have.  I still believe I will have some amazingly sweet and wonderful melons soon.  We have been enjoying the tomatoes that have ripened as well.  To me there is nothing quite like a warm ripe tomato right off the vine.

No sewing has happened yet today.  It has been a computer day.  I am not especially fond of these kind of days but they are necessary.  It does feel good to have the supply lists for upcoming classes done and sent, orders for patterns filled and shipped, emails sent, questions answered, etc. completed.  

I have wanted to undertake another scrappy block quilt and decided I would invite you along on this journey with me.  Starting in September I will post blocks and a picture tutorial on putting them together for each month until we complete enough for a quilt.  I am looking forward to using up some of my stash and scraps for this.  My scrap baskets that I had organized so neatly have now become scrap overflowing baskets and organization has gone out the window.  I hate when I let that happen.

I hope you choose to come "grow and sew" with me in September.

Loving the smell of falling rain,
Dee

Making this for dinner and thought you might like the recipe.  Posting this one for my knitting friends and our conversations about poke cakes.  :)

BANANA PUDDING POKE CAKE!!!

A new way to make it! 

Ingredients

1 box yellow cake mix (& ingredients to make cake)
2 box (small) instant banana pudding
4 c milk
8 oz whipped topping
20 vanilla wafers, crushed
sliced bananas - use your own judgment

Directions

1 Follow the direction on the cake mix box to prepare the actual cake. Prepare it in a 9 x 13" pan. When golden, remove from over and let cool for a few minutes.
2 When just slightly cooled, use the end of a wooden spoon (the handle end) to poke holes into the baked cake. Don't be shy; make the holes big enough for the pudding to seep into and go deep enough with the spoon that you hit the bottom of the pan.
3 Next, prepare your pudding mixture. Combine your 4 cups of milk and the instant pudding mix; whisk until fully combined and there are no lumps.
4 Now it's time to fill those holes! Pour the pudding mixture over the entire cake, taking care to get it into all your holes. Use the spoon to help really get it into the cake and spread evenly.
5 Refrigerate for about two hours... or until set. Top with whipped topping, crushed vanilla wafers and sliced banana! Serve and enjoy. (Refrigerate any leftovers.)
(From Betty Crocker and Just a pinch)